Is there a more satisfying meal on a cold winter day than a slice of warm bread and a bowl of hot soup?
Growing up, we had a wood stove for central heat and some of the best days were when my parents would cook up a large pot of soup on the woodstove. I’ve continued that tradition in my way, however, without the woodstove.
The tools of the trade area large pot, the kitchen cooktop, and a pressure canner. Each fall, we dedicate a few weekends to soup making. One staple of our fall tradition is a rich and savory beef vegetable soup.
The great thing about this soup is that, unlike other more sophisticated culinary adventures, beef vegetable is more of a junk-drawer approach to cooking. If ya have it left over, toss it in. So let’s see what’s on hand and start cooking.
A Tale of Two Canning Methods
There are two types of canning. Water-bath canning and pressure canning. Water-bath uses boiling temperature to kill off bacteria and preserve food in a sealed jar.
Pressure canning is similar. However, it uses pressure to achieve higher temperatures, therefore, can kill off bacteria in a wider range of environments (e.g., lower pH).
Additionally, water-bath is the more widely used of the two methods. It’s simpler, it uses inexpensive equipment, and I believe we perceive it to be less complicated.
Water-bath canning is safe for foods that are acidic or have high sugar content. These include jams, jellies, some vegetables, and a few sauces.
The combination of the acidity and the canning temps suffices to kill off and further prevent the growth of pathogens that will make you sick. These primarily include bacteria and spores.
Pressure canning increases the processing temps and therefore the range of foods you can preserve. This includes meats, soups, and some stews. This is the part I love about pressure canning. I use it to put up full meals rather than side dishes and desserts.
Using our pressure canner, we do up pork, chicken, corned beef, several soups, and a few “stews.” In the stew category, I include chicken cacciatore and an awesome stick-to-your-ribs chili.
Pressure canning can also process a few low-acid vegetables. In our house, we do up canned beans (black, pinto, and northern) as well as baked barbecue beans.
The one disadvantage to pressure canning is that you will need a specialized canner. For this, read on.
Pressure Canners
As you might expect, it takes special equipment to increase pressure enough to raise the boiling temperature of the water. And you’d be correct.
In order to achieve this in a safe and manageable way, pressure canners differ from water-bath canners with 4 critical parts:
- an airtight seal,
- a locking mechanism,
- a pressure control mechanism,
- and a safety vent.
The seal isolates the canning environment such that when applying heat, the pressure increases. This is basic physics.
The seal forms the air-tight boundary between the canner and the outside world which allows us to build a little pressure. To do this, however, we need a locking mechanism. But first, a little more about the seals.
Some pressure canners use a rubber or silicone seal while others use a well-machined metal-to-metal contact surface.
Regardless of the method, you should always refer to your manual for the steps to both check the seal and to maintain it. Remember, no functioning seal, and no increased pressure. No pressure, no increased temperatures. No increased temps, no preservation. Then you get sick.
Reinforcing the seal is the locking mechanism. The lock essentially clamps the lid down on the canner engaging the seal. It’s the combination of the lock and the seal that makes the pressure canner an airtight unit.
Disclosure: if you visit an external link in this post and make a purchase, I may earn a commission. Read my full earnings disclosure here.
Each canner brand has a different lock. My All-American has six screw-down locks, while most Presto canners simply twist the lid in place to lock. Regardless, review your manual for the proper lock use.
Once the lock is engaged, and the heat is turned on, the canner builds temperature. The setting of the correct temperature and, therefore, the appropriate pressure is the work of the pressure control mechanisms.
In the case of both the All-American and Presto, this takes the form of a weight that is set on a small nipple. Manufacturers calibrate the weight to maintain the internal pressure at a specific value. This is usually 10,15, or 20 pounds.
Which weight you select will be based on your altitude. Normally, 10 pounds of pressure is used up to 1000 feet above sea level. Additional pressure, and therefore, weight, is required above this elevation. Again, reference your manual for the proper settings.
Finally, and most important are the various safety mechanisms. These release pressure on the canner if it builds to dangerous levels.
Unless you are cooking in your canner, it is not likely that the vents will get clogged. If they do, then the vent releases pressure to prevent explosive results.
The most important thing, and I hate to sound like a broken record, is you should always review your manual and follow all instructions and perform all maintenance operations. Do this and you’ll be able to pass your canner to your grandkids.
Equipment
Aside from your canner, you’ll a few other items to get you through your pressure canning adventure. These include jars, lids, and a few convenience tools.
You would expect jars to be self-explanatory, however, they require just a smidgen of thought and review. First, you must use jars that are specifically designed for canning.
To my knowledge, there are no specific pressure canning jars. When you purchase them, just make sure that they are for canning. If they don’t say canning, then they are most likely for decoration. Pass them by and keep on the lookout for proper jars.
One resource that is great for canning jars is friends and relatives that are getting out of the hobby.
I have received most of my jars from my parents, grandparents, or friends. Most recently, a friend gave me over 200 jars that both she and her parents/grandparents used.
Remember, your canning jars are reusable. That’s why I cherish the ones I have from older generations. I can only imagine the meals that have been stored with them.
I gladly and reverently use old jars. It keeps me in touch with the canners of old.
Next, you will need lids.
Unlike jars, lids are single-use only. Once they have passed through a canner, they can no longer be used again. While you can creatively recycle them (I used my old veggie lids for tinctures jars after I have thoroughly washed them), you can’t re-can with them.
That being said, buy them every season, every sale, and every chance you can get. They, within reason, don’t go bad.
Next, you will need three helper tools: lid lifter, jar lifter, and funnel.
Working in reverse order a wide-mouth funnel isn’t necessary, but it will save you from spills and a lot of clean-up. We use both plastic and metal funnels. There’s really no difference and I usually grab whatever is on top of the canning supplies pile.
Next is a jar lifter. I feel that this is a must-have. They save you from scorched fingers and dropped jars. They are also inexpensive insurance.
Finally, is the lowly magnetic lid lifter. We canned forever without one, then finally got one for Christmas. Sitting there quietly in a stocking. We now have three. Top, middle, and bottom of the canning supplies box.
A lid lifter is essentially a magnet on a stick. They help you retrieve lids and rings from their own pot of boiling water. They are so simple that I wish I had invented it.
Canning Safety
Before diving into the canning deep end, let’s pause and look at a few safety concerns.
Due to the reliance on higher pressures, this style of canning requires a bit more attention above standard canning precautions. Knowing that I’m repeating myself – read the manual!
Ok, that’s over. Next, you are dealing with temps above those of traditional water-bath canning. The canner will be hot, the jars will be hot, the steam is hot. Wear gloves, use your jar and lid lifters, and be careful.
Next, pay attention to temperatures. This is a hot-pack recipe, that is the soup will be hot when you jar it. Aside from the normal cautions of handling hot food, you also need to pay attention to the jar temps and the water temps in the canner.
Before I wised up, I lost at least one jar per canning session to thermal shock.
Putting cold jars in hot water broke more jars than I care to admit. So, take my sage advice (and probably common sense) hot food goes into hot jars, and put hot jars into hot canning water.
In this recipe, we will heat the jars with hot tap water before ladling in the soup. When you prep up your canner, add hot tap water and turn the burner on low. Then add in your jars once filled and the rings and lids are on. Keep everything in the same temperature range and you’ll be fine.
We will save food safety for a later section. So, let’s get to the recipes!
Soup to the Rescue
Next to chicken soup, Beef Vegetable is my favorite. Chicken wins only because of its versatility, but that’s a subject for another article. Beef is a very close second.
This beef soup excels in stomach filling and soul-warming. What makes this even better is that once it’s canned, you can go from cupboard to dining room table in under 15 minutes.
This recipe is pretty simple, and each batch is a little different. That is because we always have a different mix of veggies to add to our beef broth based on what we want to use up. These have included carrots, peas, green beans, corn, and even zucchini.
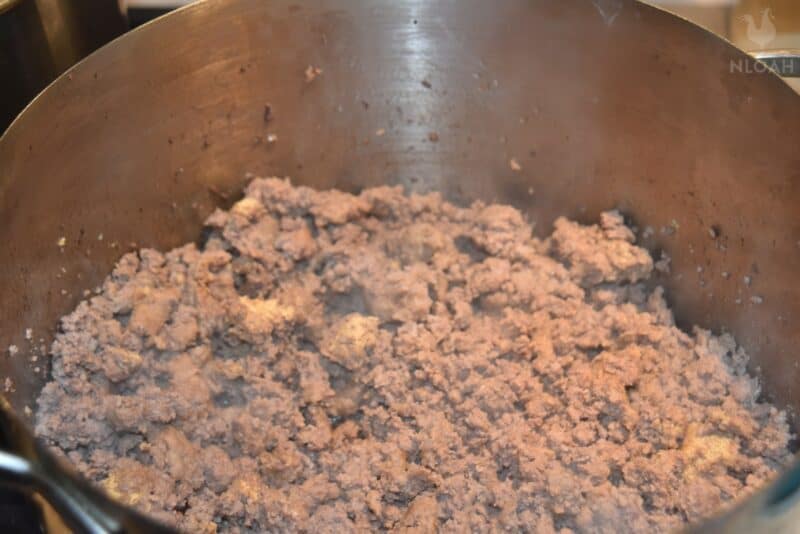
The base of the soup is ground beef. Then we add vegetables and a few tomatoes. Next, we use chicken stock to build a flavorful broth. Finally, there’s one secret ingredient.
All of the ingredients here are suggestions. Feel free to experiment and add or subtract based on your taste. Our first batch simply used onions, carrots, and celery. We were soon adding frozen mixed vegetables as we had them on hand.
Next batch was done at the end of summer when we noticed one last monster zucchini in the garden. So, it went in.
Finally, our secret ingredient is roasted tomatoes. You can purchase canned roasted tomatoes, but we usually make our own.
Just quarter up your tomatoes, toss in olive oil, generously add salt and pepper, then roast at 300 degrees until most of their liquid has cooked off and the tomatoes start to get more like leather than tomato. These go into the freezer until soup season.
Beef Vegetable Soup Recipe
Yield: 2 gallons
Ingredients
- 2 pounds ground beef (you can use chuck roast meat or beef stew meat as well)
- One large onion – diced
- Four stalks of celery – diced
- Four carrots – diced
- One head of garlic – chopped fine
- Water
- Chicken broth
- Chicken bouillon (optional)
- 16 oz can of diced tomatoes
- 2 tablespoons parsley
- 1 tablespoon oregano
- 1 tablespoon basil
- 1 teaspoon thyme
- Large bag of mixed vegetables
- 2 cans beans (northern, cannelloni, black, or pinto)
- Salt and pepper to taste
- Secret ingredient: 1-2 cups oven-roasted tomatoes
Notes:
- Experiment with mixes of beans and other vegetables
- We often use zucchini, quarter it lengthwise and remove the seeds, then slice it 1/8” thick
Instructions
- Brown the ground beef in a 2.5-gallon stock pot
- Remove the browned beef and set aside in a bowl
- Remove all but 3 tablespoons of the rendered fat
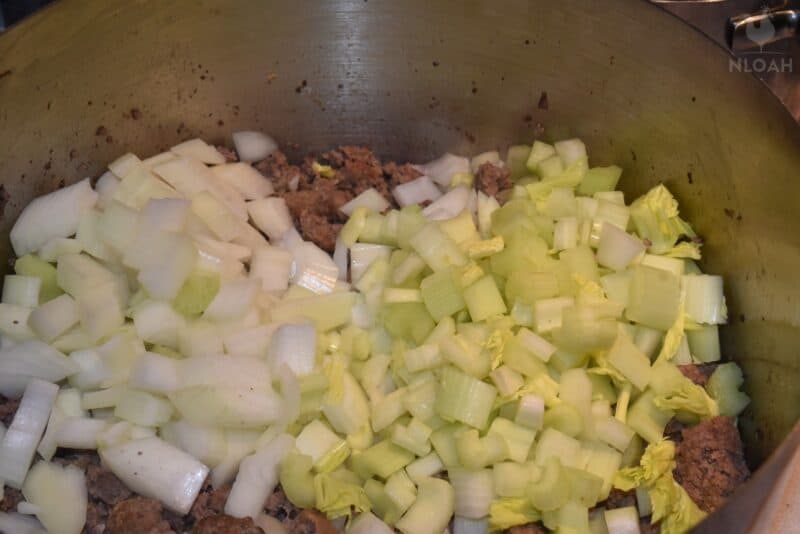
- Add the diced onions, celery, and carrots and cook until the onions are translucent
- Add the garlic and cook until fragrant
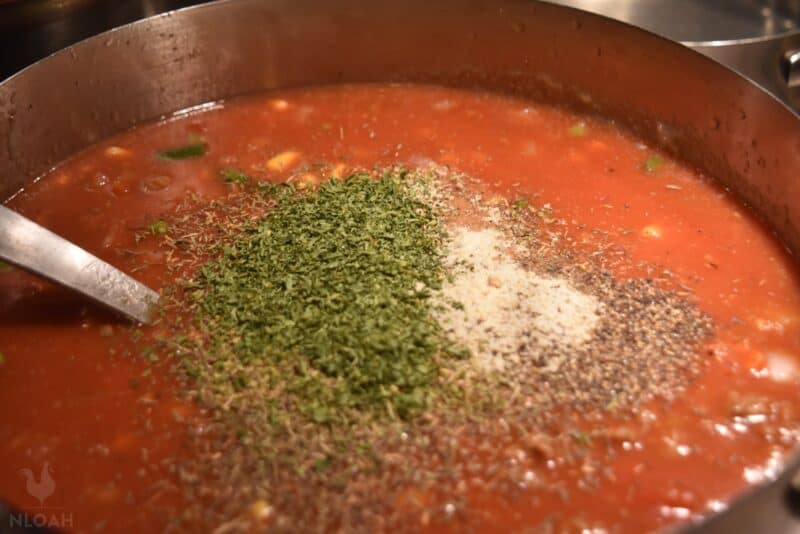
- Add spices and mix well
- Add reserved ground beef and mix well
- Drain and rinse beans
- Add diced tomatoes and beans
- Add mixed vegetables
- Add chicken stock and water in a 50:50 ratio. You should be able to start with 2 quarts of each but add more if necessary, as your total volume should be 2 gallons
- Bring the soup to a simmer
- Add the roasted tomatoes
- Simmer for 1 hour
- If you are adding zucchini as a vegetable, add it now
- Taste and adjust your spices by adding pepper and other spices to taste. If the soup needs a little more salt, we usually add chicken bouillon
- Simmer for another 30 minutes
- If canning, move on to the next section, otherwise enjoy a hot bowl
Now that the soup is done, on to canning it!
Beef Vegetable Soup Pressure Canning Recipe
Ingredients
- 1 batch of the above Beef Vegetable Soup recipe
Instructions
- Add rings and lids to a pot, cover with water and bring to a boil
- Add hot tap water to your canner according to the directions
- Empty the hot water from the jars
- Fill each jar with hot soup
- Leave 1” of headspace – this is the space between the top of the soup and the top of the jar
- Clean off the rim with a paper towel dampened with vinegar
- Add lids and rings. Center the lids on the jars. Finger tighten the rings – don’t crank down on them
- Add jars to the canner
- Place the lid on the canner and tighten according to the instructions
- Turn the heat on high
- Allow the canner to heat
- (All American specific) Once the steam comes out of the vent, allow the canner to vent 10 minutes. Add the weight to the vent.. Once the weight jiggles, adjust the heat until it jiggles 4-10 times per minute. The temperature should come up to 240-245 degrees F (115 – 118 C).
- 13. Allow the canner to process for 90 minutes for quart jars.
- 14. After processing, turn off the heat.
- 15. Allow the canner temperature to come back to 200 degrees (93 C).
- 16. Remove the weight and let the canner vent for 10 minutes.
- Remove the lid and then remove the jars.
- Allow the jars to cool and come to room temperature. Listen for the “ping” of the lids sealing.
- Test the lids to make sure they have dimpled and no longer flex.
- Once cooled, remove the rings and give the jars a quick rinse.
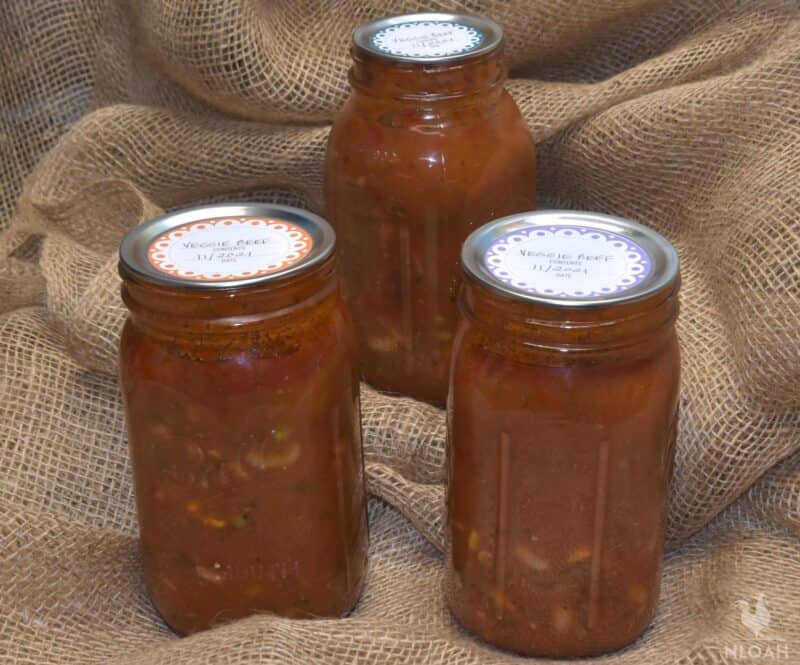
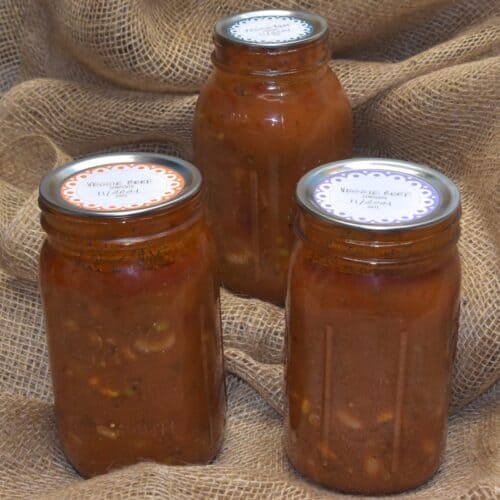
- Label and date each jar.
Heat and Eat
The best thing about this soup is how easily it goes from the jar to the kitchen table. We all live busy lives and it’s fantastic to have a hot meal in just a few minutes.
As far as recipes go, this one is too easy. Pop the lid, reheat (microwave or stove), serve, and eat. Served with a slice of warm fresh bread and you’re all set.
There are a few options for making it a little better (you know I wasn’t going to leave it just at that)…
First, we love to add a few fresh herbs when in season. Just a sprig of oregano, a leaf of basil, or a handful of chopped parsley while it cooks on the stove is enough to brighten up the flavor. You can also add fresh vegetables that don’t take too long to cook. These include tomatoes, scallions, and zucchini.
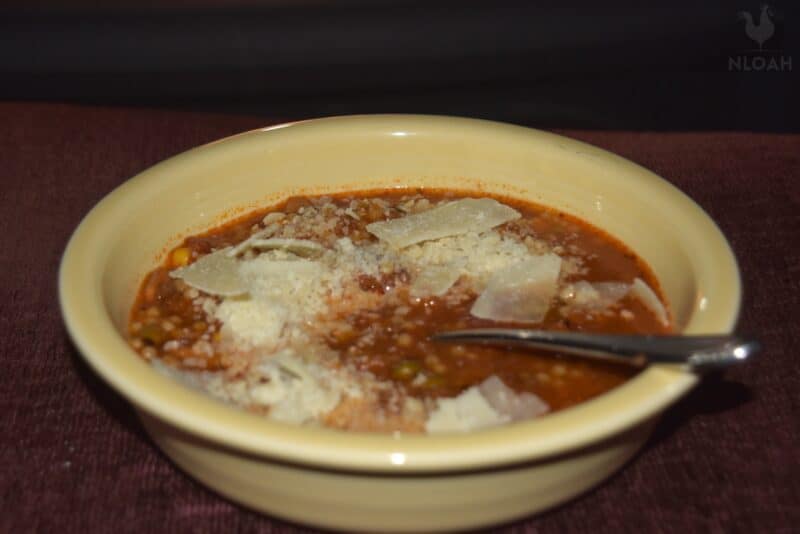
Second, we love to serve it with a little Parmesan cheese. You can either mix a ¼ cup in while it cooks or add a tablespoon on top of each serving.
You can also add potatoes, noodles, pasta or rice to the soup to add a bit of variety to it and change up the flavor a little bit.
Finally, I find a little olive oil drizzled on top really adds a rich mouth feel and luxurious texture to the soup. In times of survival, it also adds extra calories.
Whether you choose to serve it plain or add a bit of freshness to it, this one is easy as it gets. Whatever you don’t eat, you can store in an airtight container in your refrigerator to be enjoyed later.
Storing and a Last Word on Food Safety
Protecting yourself is just as important as protecting your canned goods. Let’s start with proper precautions when reviewing and opening each jar.
Regardless of if your jar is a day old or a year old, always do a quick review of the jar to make sure it’s safe. Always trust your senses, look, listen, smell, and taste.
First, look at the jar and the lid. Make sure there are no chips and cracks in the glass and no rust or holes in the lid. Make sure that the lid is dimpled in and does not flex when you press it.
Next, check the contents. The broth should have a natural color and shouldn’t be cloudy. The top of the liquid should look natural (e.g., a layer of fat is fine, but off-colored beef or vegetables is not).
Now pop the lid. Do it slowly and listen for the hiss of the vacuum. No hiss means no vacuum. If there’s no vacuum, then the food is spoiled. Also, take a quick smell of the jar. It should smell like soup. You’ll know a bad jar when you smell it.
Finally, trust your sense of taste. When you take that first bit, if it tastes off, it probably is. Move on to the next can.
When I’ve had a jar go bad, and I’ve only had a handful, I’ve known it. They were off-colored (think green and fuzzy), and the smell could turn the strongest stomach.
After self-protection is jar protection. Cool, dry, and dark is the way to go. Kept in the proper storage conditions the FDA states that home-canned food is good for 1 year. Commercially canned goods are good for 5 years.
That being said, I’ve had a few of my own jars that have been 3 and even 5 years old. All have passed the look, smell, and taste test. And I’m still here!
Use A Dark Storage Space
OK, back to storage. First, keep your jars cool. The basement is best. Avoid attics and garages. If you don’t have a basement, then any climate-controlled space is good. Just avoid large temperature swings. The cooler you store your jars the longer they will last. Heat speeds up the spoiling process.
Next, keep them dry. A moist environment contributes to mold, mildew, and rust. Mold and mildew won’t generally damage the contents of the jar unless they are so severe that they work under the seal of the lid. Otherwise, they just damage any paper labels dating the jar.
Rust, on the other hand, is a bit more of a challenge. A little spot of rust is fine. This happens as rust takes hold of any scrapes or scratches on the lid. As long as the seal is intact, you should be ok.
As soon as you see any rust, prioritize the jar to the front and open it as soon as possible. That being said, a dry storage area minimizes this problem.
Next is dark. Any sunlight will slowly impact the taste, nutrition, and texture. While light won’t make your contents inedible, they will make them undesirable.
If you don’t have a dark place, like a basement, just store the jars either in boxes or under a thin blanket. Grocery and big box stores usually have a great collection of boxes sized perfectly for quart jars. In fact, most of the jars that came from my grandmother were in old spaghetti sauce boxes.
Finally, keep them protected, especially when traveling. There’s nothing worse than losing a jar to slippy fingers or a bout of clumsiness. Always store them on sturdy shelves. If losing one jar is bad, imagine losing all your jars to poor shelves.
Final Thoughts
We can a lot of food. From fruit to veggies to meats, to full meals such as soups. Each one is rewarding in its own way.
The fruits, veggies, and meats are building blocks to complete meals. They help us bring healthy food with a known history into our kitchen. They also allow us to extend our garden’s bounty beyond the normal harvest.
There is a satisfaction in cooking with your own food. You know where they came from. You know what is in them. This not only adds a personal seasoning to each meal, but it also raises our level of self-sufficiency.
Canning an entire meal also adds a level of convenience to our lives. Not only does a jar give us a healthy meal, but it frees up just a little more time in our busy lives.
Give this soup a try. I’ll bet that you’ll not only enjoy the canned product, but you’ll also make another, even larger batch. Since nothing beats a warm bowl of soup on a freezing cold winter night!
There are also many more recipes that you can find on social media sites including Facebook, Instagram, and Pinterest.

M. I. Grey is an expert in food processing and preservation (including canning), but also an avid forager. He’s also passionate about anything preparedness, and used to work as a security expert.
Hi I made beef vegetable soup. I just got done jarring it. I am just unsure where to store it since meat is in it. Should I store in the fridge? Sorry if this is a stupid question. Thank you
Great article! I’ve been canning for about 53 years and I too just throw the veggies in. As ranchers, we are so busy and this is so convenient when you’re getting older and a little less able to work those long days. Thank you for your great breakdown of directions. You can tell you don’t work for the FDA!