So, you wanna know how to corn, huh? Well, let me tell you, there’s nothing to it! Canning corn is a great way to preserve your bountiful summer harvest.
While some people aren’t fond of traditional store-bought canned corn, canned corn from your own homestead or garden has a distinctly different (read: better!) flavor.
It can be used in a variety of ways, and lasts indefinitely when stored in a cool, dark location.
There are two ways to can corn- You can ‘raw pack’ or you can ‘hot pack’. Raw packing is easier because it doesn’t require any pre-cooking before filling jars.
Though some people may prefer the flavor of hot packed corn. If you’ve never canned corn before, I’d encourage you to try both methods to see which you like the best.
You can also freeze corn, which is another great way to preserve corn, but it does take up valuable freezer space and isn’t quite as convenient to use as a daily kitchen staple as is canned corn. If you decide to freeze corn, you should always blanch it first to help preserve its flavor and color.
Tips for Canning Corn
There are so many delicious varieties of corn you can process in a canner. The best kinds are those that are extra-sweet and bicolor or white, such as Temptation, Silver King, Whiteout, or Providence.
For best results, experiment with what you plant in your garden. If you want to can corn throughout the summer and well into the fall, plant varieties that will mature at different times, such as 50, 60, and 90 day varieties.
This will give you a consistent harvest of fresh and canner-ready corn.
Ideally, you should preserve your corn within two to six hours of harvest for the best quality canned corn.
You can wait a bit longer than that as well, but the likelihood of the corn changing colors is higher the longer you wait. Some varieties will turn brown, white, or gray, but this doesn’t mean it’s not safe to eat.
Disclosure: if you visit an external link in this post and make a purchase, I may earn a commission. Read my full earnings disclosure here.
What is important to remember about canning corn is that you always must use a pressure canner. Do not try to can corn using a water bath canner.
Water bath canners don’t cook your food to high enough temperatures to kill all bacterial spores, such as those that cause botulism, so you can get incredibly sick if you can corn using a water bath canner.
This rule applies to all low-acidity foods (which includes all vegetables, meats, and seafood). Truly, only fruits (including tomatoes) and pickled items can be safely canned in a water bath system.
Pressure canners, on the other hand, can heat your food to much higher temperatures. That is why a pressure canner is the recommended tool to preserve any low-acid vegetable or food like meat or stock.
You should always follow a recipe when canning with a pressure canner – don’t try to “wing it” on your own. This is a very precise practice that does take some getting used to.
You should also avoid using a pressure cooker for your canning. Many people view the two as interchangeable pieces of equipment, but that’s not the case.
That being said, to get started with canning corn, you will need to follow these steps.
What You’ll Need:
- Sterilized jars (pints or quarts)
- Lids and rings
- Fresh corn
- Canning salt (optional)
- Funnel
- Ladle
- Jar lifter
- Pressure canner
*TIP: About 12 ears of corn will fill 1 quart jar, depending on the size of your corn of course.
Prep Time:
- 20 minutes
Total Time:
- 90 minutes or more (depending on how long it takes to heat the canner and whether you are canning in pints or quarts)
Nutrition:
- Serving Size: ½ cup (approximately 4 servings per pint jar)
- Calories: 88
- Carbohydrates: 20 g
- Protein: 2.7 g
- Fat: 1 g
- Fiber: 2.3 g
In general, about thirty-two pounds (before husking) of sweet corn will fill a canner load of seven quarts, while twenty pounds is needed for nine pints.
Cold Pack Method
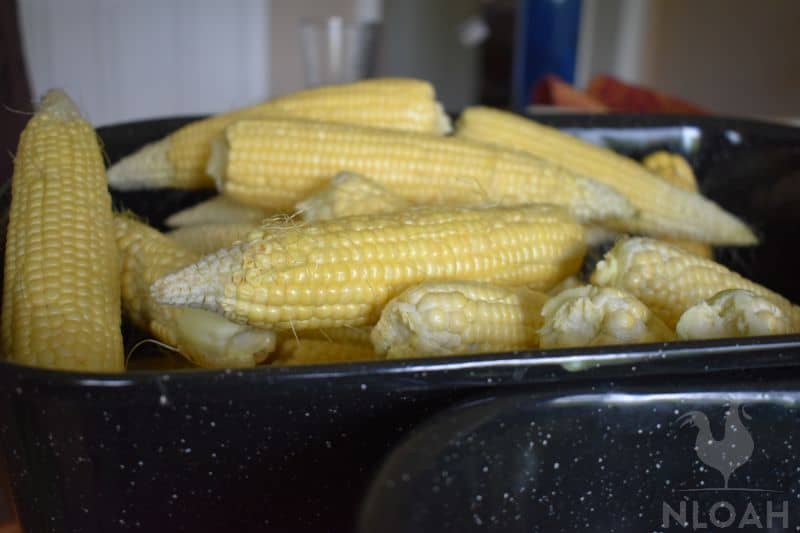
Step 1. First, select your corn. Remember that the end product of your canning experience is only as good as what you put into it.
Select only the freshest, ripest corn. Discard any corn cobs that are not fully developed or have poorly-developed kernels. Get rid of those that have suffered from an infestation of bugs or disease, too, as the kernels will not taste good and can contaminate the rest of your batch.
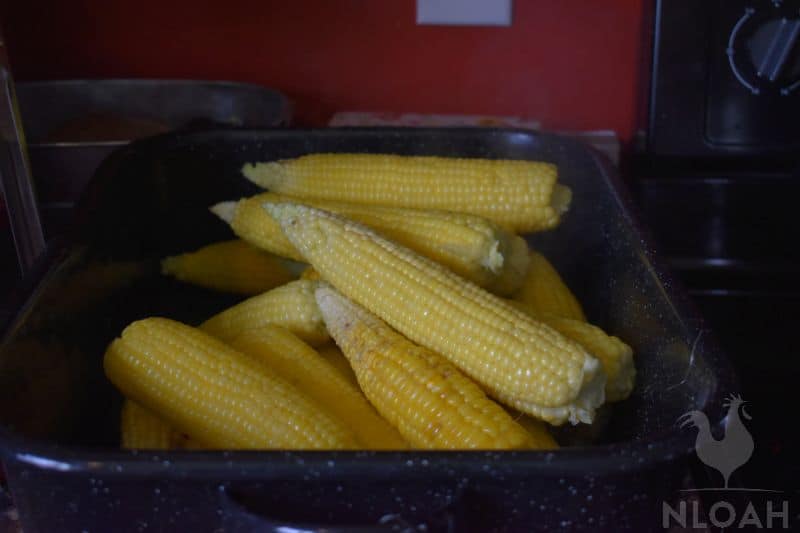
Then, clean the corn by removing the husks and silks, and washing well:
Try to remove all loose strands of silk so that you aren’t left with any floating in your canned corn. Cut off any bad spots.
Step 2. Cut the kernels from the cob over a large plate or cookie sheet, cutting as closely to the cob as possible. Don’t feel the need to scrape the cob itself.
Try not to cut into the cob, as this can affect the taste of the corn. Your kernels should stick together in strips or pieces when you’re ready to can.
Cutting the corn will be a somewhat messy process, so try to do this in an area you don’t mind getting a little slimy and sticky.
Step 3. While you’re cutting the corn, you can prepare your canner and canning jars. Sterilize your canning jars in the dishwasher or by running them under hot water for several minutes.
You should also sterilize your bands. You don’t need to do anything with the lids quite yet. Remember, those should be brand new. You can reuse your canning jars and rings, but not the lids.

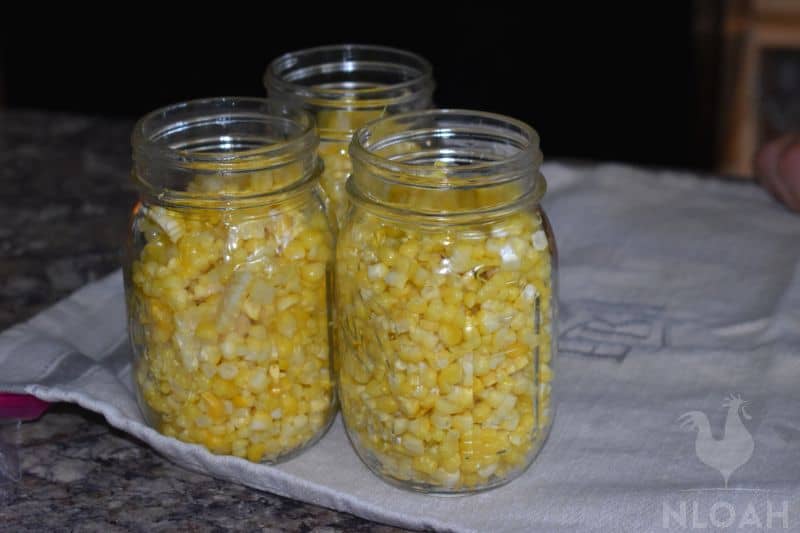
When you’re done cutting, pack the corn loosely into the hot jars, leaving about 1 inch headspace. Don’t shake the jars to pack them tight.
Step 4. Add salt to jars if desired. Salt is only added for flavor; it’s better to under-salt than over-salt. You can also skip the salt altogether.
Step 5. Ladle boiling water over corn, leaving 1 inch headspace.
Step 6. Remove air bubbles with a wooden or plastic utensil (never metal), as this can etch the glass and cause the jars to fail when it comes time to seal).
Step 7. Wipe the rim of the jar with a wet rag to remove any food particles.
While you are wiping down your jars, go ahead and put a pot of water on the stove to simmer your lids. You only need to warm them for a few minutes or so.
Step 8. Put on a clean, previously simmered lid. Remember that while you can reuse bands from year to year, you should never reuse lids. They lose their ability to seal and can cause your food to spoil prematurely. Screw on the ring/band.
Step 9. Process pints for 55 min, quarts 85 min. at 10 lbs. pressure. If you live at a higher altitude and are using a dial gauge canner, you will need to adjust your pressure accordingly (usually around a pound of pressure or so for everything two thousand feet in altitude, although this varies).
Here are the steps to follow when it comes to processing the corn in a typical dial gauge pressure canner:
- Start by putting water in your pressure canner (how much to add will vary depending on your make and model of canner, but most require about three quarts). Turn the burner on as you load your jars.
- Check the lid of your pressure canner to make sure the vent is clear and not clogged with food. Then, secure it on your pressure canner.
- Let the pressure canner heat up until steam begins to come out of the vent. Allow the canner to vent for ten minutes before you attach the weight (if you are using a dial gauge canner, that is). Attach the weight (pressure regulator). The air vent will serve as a visual indicator of the pressure in your canner. Wait for it to pop up – if it doesn’t pop up within a few minutes, you may need to remove the regulator (but be very careful doing this so the steam does not burn you).
- After the vent pops up, keep an eye on the pressure in your canner as it climbs. Once you hit 10 lbs, start your timer for 55 minutes. As the canner is processing, you will need to keep a close eye on it to make sure it doesn’t drop below or go above 10 lbs pressure. If the canner drops below 10 lbs pressure, adjust your heat and restart your timer. If it goes above, you don’t have to restart the timer, but you do need to adjust the heat, and lower it to make sure the pressure doesn’t climb too high. Anything over 15 lbs or so is a recipe for disaster!
Step 10. After the 55 minutes has elapsed, it’s time to shut off the heat. It’s important that you wait for the pressure in your canner to go back down before you remove the lid. Give the canner at least forty-five minutes to cool and resist the urge to remove the canner. the burner.
Although you can often do this without any ill effects, jostling the canner when it’s fully pressurized is risky and can cause you to seriously injure yourself if you aren’t careful.
Make sure the pressure is at zero before you open the canner. Remove the regulator, and if you hear any hissing noise, stop and let the canner continue to depressurize. Once the pressure has stabilized you may remove the lid and then the jars.
A tip? When you’re taking the lid off the pressure canner, even after the pressure has stabilized, tip the canner lid away from you. This can prevent you from burning yourself with steam or the hot water on the underside of the lid. When you remove the jars, wear a pair of oven mitts to guard your hands from the steam.
Step 11. Turn the jars upside down on a clean towel to cool, keeping them out of a direct breeze as this can cause the jars to crack. They should rest for twelve to twenty-four hours before storage.
You may notice that the jars continue to bubble and boil even after they’ve been removed from the canner – remember, it gets hot in there!
Corn will last for several years in storage. You might notice your rings rusting or a white film appearing on your lids. This is not dangerous.
Rust can be prevented by removing the rings upon storage, while film usually just indicates that you had hard water when you were canning. Similarly, your can may turn a pale brown color when canned. Again, this is nothing to worry about.
Generally, the sweeter the corn, the darker it will turn when cooked. Watch for other signs of spoilage, like a bulging lid, bubbles, or leaking jars.
Hot Pack Method
The steps for hot packing canned corn are more or less the same as the ones you would follow if you were cold-packing it – but you’ll cook the corn first!
Step 1. Clean the corn by removing the husks and silks, and washing well. Cut off any bad spots.
Step 2. Cut the kernels from the cob, cutting as closely to the cob as possible. Don’t feel like the husks and cobs need to go straight into the trash can when you’re done with them, either.
Husks are great compost ingredients, while cobs make a tasty treat for pigs and other livestock.
Step 3. Measure how many pints or quarts of corn you end up with. Again, roughly thirty-two pounds of corn is enough for a canner load of quart jars.
Step 4. Pour the corn into a large pot. Add 1/2 tsp salt and 1 c. boiling water to each pint of cut corn. Add 1 tsp salt and 2 cups boiling water to each quart of cut corn.
Again, salt is not absolutely necessary, but enhances the taste of your canned corn. You can also add other seasonings, like parsley, cilantro, or garlic, to help season your corn if you so choose.
This part of the canning process is my favorite – you really get to experiment with the flavors and seasonings you like most!
One additional note – you can cook the corn before you cut it off the cob first, if that’s easier for you. Simply blanch the ears for three minutes before you cut the kernels off the cob. The choice is yours – it’s not a matter of safety, just one of convenience.
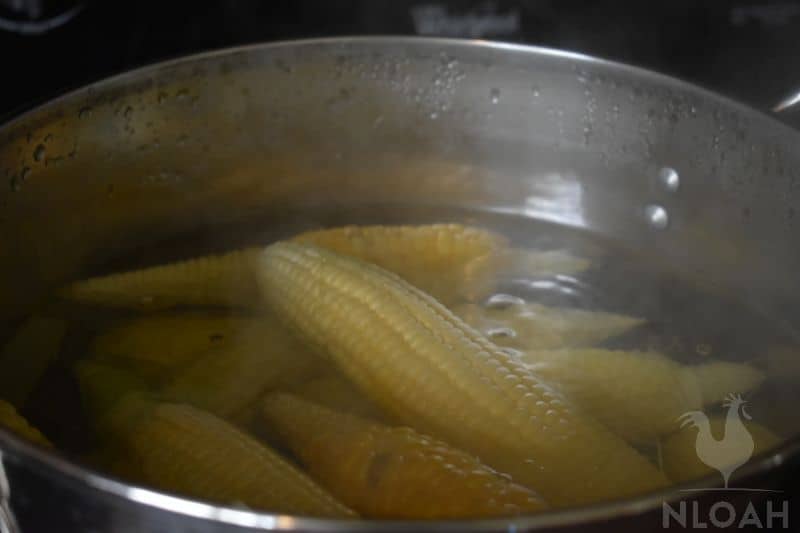
Step 5. Bring all to a boil; reduce heat and simmer
Step 6. While your corn is cooking, you can prepare your jars. Make sure they are thoroughly sanitized and that you have sterile, hot lids ready to go. Ladle hot corn and liquid into hot jars, leaving 1 inch headspace.
Step 7. Remove air bubbles with a wooden or plastic utensil (never metal).
Step 8. Wipe the rim of the jar with a wet rag to remove any food particles.
Step 9. Put on a clean, unused, previously simmered lid. Screw on the ring/band.
Step 10. Process pints 55 min, quarts 85 min. at 10 lbs. pressure. Again, remember to adjust for altitude if you live at such a location, *NOTE: Sweeter corn may turn a little brownish in color after canning. That’s okay.
Follow the same canning and finishing steps as you would for cold-packed corn. Remember – don’t touch that canner until the pressure has reduced! This is how pressure canning has received a bad reputation over the years.
Many people have prematurely opened the pressure canner only to realize they have created a small accident in their own kitchens. Don’t put yourself at risk by rushing things.
Canning Creamed-Style Corn
If you like creamed-style corn, you can even can your own at home. To do this, you will need to boil your corn first for about ten minutes.
Transfer the corn to a blender and add half a cup of cream, half and half, or other similar milk product. Then puree, add a dash of butter and salt, and either can, freeze, or serve immediately.
The main difference with canning cream-style versus fresh corn is that you can only can cream corn in half-pint or pint jars (not quarts), as larger jars won’t heat up enough to safely can the milk-based ingredients. You will process pints for 85 minutes rather than just 55.
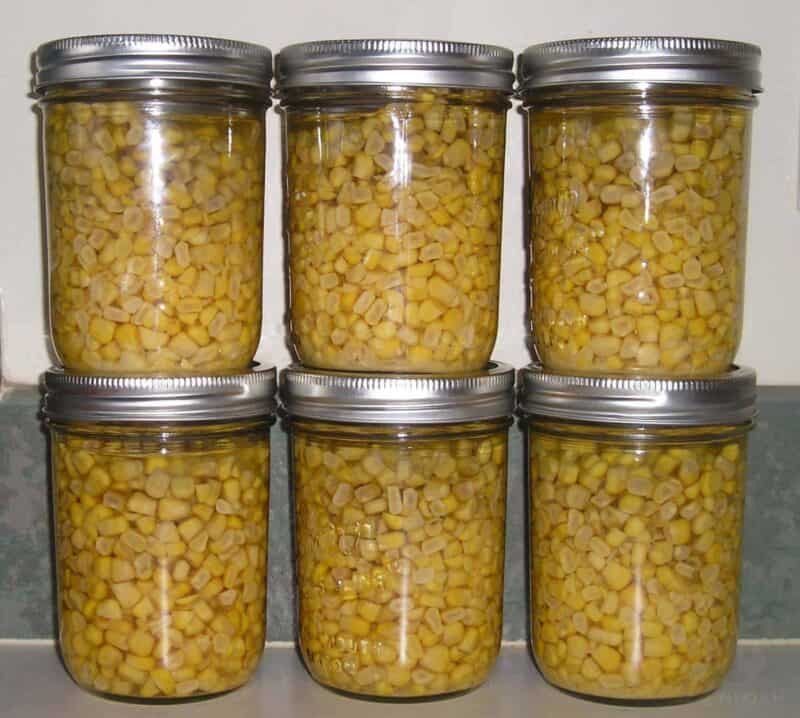
Canning Corn At Home
Your canned corn should end up with a sweet, slightly crunchy texture.
It can be enjoyed throughout the year either by itself or in a variety of dishes (such as cornbread, soups, or salsas!). Experiment with several recipes until you find the one you like best for your canned corn.
Corn is rich in nutrients such as carotenoids, which aid eye health, and other vitamins and minerals, so it’s important to include it as part of your family’s regular diet.
Best yet, corn that you have canned yourself is much healthier than store-bought varieties.
Processed canned corn tends to be extremely high in salt and other preservatives, making it a less healthy option if you’re trying to eat a low-sodium diet.
By canning your own corn, you have more control over your diet, and also use up every last bit of your summer harvest.
And, if you find yourself with too much canned corn at the end of the season, why not give it away as gifts?
Your family will be happy as they enjoy the end result of your summer’s work, and you’ll feel good about producing such a tasty product. A win for everyone!

A city girl learning to homestead on an acre of land in the country. Wife and homeschooling mother of four. Enjoying life, and everything that has to do with self sufficient living.
Can I use half pint jars to can corn? There are only two of us and full pint jars are too much for us. If so is the pressure and time for half pint hars the same as for pint jars?
I haven’t canned corn in quite a while now that I have a big enough freezer that holds it all. It takes so long to pressure can. However when I did I followed my step-mom’s advice and put a fairly thick slice of tomato on top of the corn in the jar before adding the hot liquid. It just seemed to add a fresher taste to the corn when we ate it. Discard the tomato when you open the corn.
I am enjoying your website recipes and adventures.