The leaves of the collard plant have been enjoyed as a food source for many years. Collard greens are high in vitamins A and C, dietary fiber, and minerals. The flavor of collards is slightly bitter and salty. They can be eaten cooked or raw, but are most often cooked.
Collard greens can be preserved by freezing, drying, or canning. When properly canned, they will last up to one year in a sealed jar.
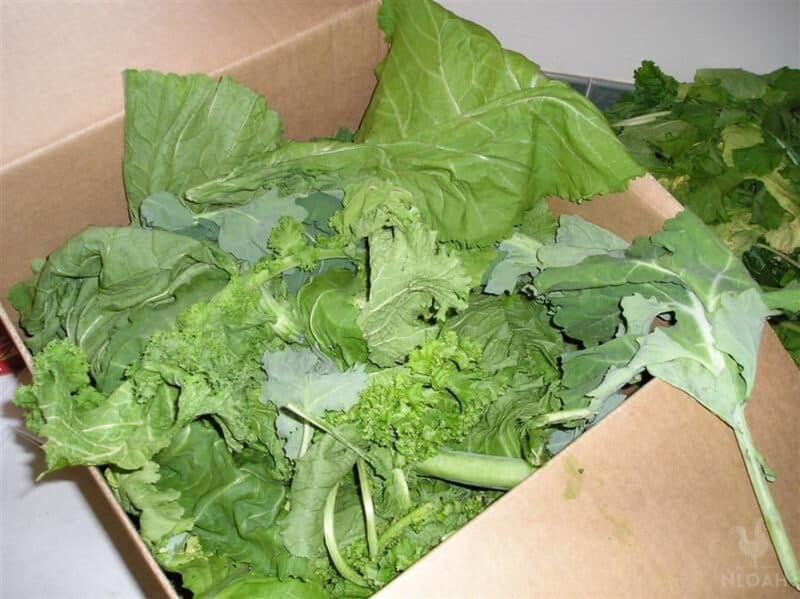
Yesterday evening, my husband came home loaded down with mixed greens which our neighbor had blessed him with on his way up the driveway:
Turnip greens. Mustard greens. Collard greens.
I’m not a huge fan of greens. I’d never even heard of “greens” before moving to the south! But Jerry likes them. And they are really good for you.
So, today I’ll be putting up this big box of greens which is currently overcrowding my countertop. I’d hate to let it go to waste!
Here are a few different ways you can preserve all of your collard greens. Note – these instructions apply to your other favorite types of greens, too, like kale and spinach!
Freezing Collard Greens
Collard greens are a nutritious and delicious addition to any meal. However, if you don’t eat them right away, they can quickly go bad. One way to extend their shelf life is to freeze them.
While some vegetables can be frozen without any pre-treatment, others require a little bit of work to ensure that they retain their flavor and texture. Collard greens fall into the latter category.
Pros and Cons of Freezing Collard Greens
Freezing collard greens has its pros and cons. On the one hand, frozen greens can last for months without losing their flavor or texture.
This is a big advantage if you want to enjoy collard greens year-round. On the other hand, some people believe that freezing decreases the nutritional value of greens. Some of the vitamins and minerals may be lost during the freezing process.
Ultimately, whether or not to freeze your collard greens is a personal decision.
Start With High Quality Produce
For the best results, start with high quality produce. Look for greens that are crisp and free of blemishes.
Rinse
Rinse the greens thoroughly to remove any dirt or debris.
Blanch
Then, blanch the greens in boiling water for three to four minutes. This will help to preserve their color and prevent them from becoming mushy.
Shock
After blanching, quickly shock the greens in ice water.
Squeeze
Squeeze out any excess moisture. I like to let my greens sit out for a few hours at room temperature to dry.
Pack and Package
Pack your collard greens into airtight containers. Be sure to label and date the packages so you can keep track of when they were frozen. They should last at least six months, if not more, when frozen.
Canning Collard Greens
Collard greens are a popular Southern dish, and they can be easily canned at home.
Pros and Cons of Canning Collard Greens
Canning foods is a great way to preserve them for later use. However, there are some foods that are better suited for canning than others.
Collard greens, for example, are a food that can be canned but may not always produce the best results.
One of the pros of canning collard greens is that it is a very quick and easy process. The greens only need to be washed and then can be placed in a pressure canner for an hour or so. You don’t need to do too much babysitting. This means that they can be canned with minimal effort on the part of the cook.
However, one of the potential drawbacks of canning collard greens is that they may lose some of their flavor during the process.
Canning can sometimes cause vegetables to become bland and lose their characteristic taste. This means that canned collard greens may not be as flavorful as fresh or frozen greens.
Of course, you’ll need to use a pressure canner for collard greens, too, since they’re a low acid vegetable. For some gardeners, that can be a deterrent.
Materials Needed
If you’re planning to can collard greens, you’ll need a few supplies.
First and foremost, you’ll need canning jars, lids, and rings. Be sure to choose jars that are the appropriate size for the amount of greens you’re planning to preserve.
Of course, you’ll need a pressure canner, too. This will be used to heat the greens and prepare them for canning.
You’ll also need a jar lifter, which will make it easier to remove the hot jars from the canning kettle. Finally, you’ll need a canning funnel. This will help you to fill the jars without making a mess.
You will need about 28 pounds per canner load of 7 quarts. For nine pints, you’ll need 18 pounds of greens. Can only fresh greens and get rid of any wilted or diseased ones.
Instructions
Start by selecting fresh, crisp greens. Wash them thoroughly, and then remove the tough stems.
Cut the greens into thin strips, and blanch them in boiling water for three minutes. Next, pack the greens into canning jars, leaving one inch of headspace.
Add half a teaspoon of canning salt to each jar, and then fill the jars with boiling water, covering the greens completely.
Add the lids and process in a pressure canner for 70 minutes at 11 lbs of pressure dial gauge and 10 lbs for weighted gauge (pints). For quarters, process for 90 minutes at 11 lbs of pressure for dial gauge and 10 lbs for weighted gauge.
Dehydrated Collard Greens
Some people like to dehydrate their collard greens before consuming them. Dehydration is a process where the water is removed from the food, leaving behind the solid parts. This can be done using a dehydrator, an oven set to a low temperature, or by air-drying.
Pros and Cons of Dehydrating Collard Greens
Dehydrated collard greens have several advantages over fresh or cooked greens. They are lightweight and easy to store, they have a long shelf life, and they retain most of their nutrients.
Some people believe that collard greens are more nutrient-dense when they are dehydrated because the process removes some of the water-soluble vitamins.
Additionally, dehydration can make collard greens more shelf-stable and easier to transport. However, dehydration can also change the flavor and texture of the greens, making them less enjoyable to eat.
How to Dehydrate Collard Greens
The process is simple: just wash the collard greens and remove any tough stems, then slice the leaves into thin strips.
You can chill the greens before dehydrating, if you choose. This will preserve the color but not much else. It’s up to you! If you chill them, you’ll follow the same steps for blanching that we included earlier in the article.
Next, spread the strips on a dehydrator tray and set the dehydrator to 125 degrees Fahrenheit. Check on the greens after about 12 hours; they should be dry and crumbly to the touch. Once they’re fully dehydrated, store the greens in an airtight container in a cool, dark place.
When you’re ready to use them, simply rehydrate by soaking in water for about 10 minutes. Dehydrated collard greens are a delicious addition to soups, stews, and casseroles.
How Long Do Collard Greens Last in the Refrigerator?
When stored properly, they can last for up to two weeks in the refrigerator. The best way to store collard greens is to wrap them tightly in plastic wrap or place them in a plastic bag.
This will help to keep them fresh and prevent them from drying out. When ready to use, simply remove the desired amount of greens from the packaging and cook as desired.
How to Use Collard Greens in Your Cooking
To prepare collard greens for cooking, rinse them well under cold water and then remove the tough stems by either slicing them off with a knife or tearing them away with your hands. The leaves can then be chopped or left whole.
Collard greens can be cooked in a variety of ways, including simmering in broth, sautéing with other vegetables, or roasting in the oven. Whatever method you choose, be sure to cook the greens until they are tender but still brightly colored.
Add a little acidity at the end of cooking to brighten up the flavor (lemon juice or vinegar), and enjoy!
When selecting collard greens at the store, make sure to choose leaves that are dark green and free from blemishes.
Before cooking collard greens, it is important to wash them thoroughly. Fill a large bowl with cold water and add the greens. Swish them around with your hands, then let them sit for a few minutes so any dirt or sand can sink to the bottom of the bowl. Drain the water and repeat until the greens are clean.
Once the greens are washed, you can prepare them in a variety of ways. No matter how you choose to eat them, collard greens are a healthy and delicious addition to any meal.
Final Thoughts
Collard greens are a powerhouse of nutrition and can be preserved in a variety of ways. By freezing, drying, or pickling collard greens, you can have this nutrient-rich vegetable available all year long. Consider adding collard greens to your next preserving project!
Do you like collard greens, or other mixed greens? I’d love to know how you guys preserve them!
updated 07/26/2022 by Rebekah Pierce

A city girl learning to homestead on an acre of land in the country. Wife and homeschooling mother of four. Enjoying life, and everything that has to do with self sufficient living.
I have a ton of collard greens and want to cook them with smoked pork hocks. Has anyone canned them after they are cooked? I have a pressure canner, so no problem there.
Thanks for any info.
My mom and I were introduced to lightly steamed greens and we love them! She grew up with the southern way, but we take usually collard greens (loaded with calcium!) or kale and cut them in small strips (cut out the big stem in the middle), and put them in a tiny bit of water in a pan or steamer basket & steam them just til they turn bright green–about 2-5 min. only. Then we put our favorite salad dressing on them after they cool. They’re really good this way; different, but great! 🙂
Martha,
I’ll have to keep this in mind as I learn to like greens more. I know they are super good for us, and I do plan on making them a part of my family’s diet. Thanks for sharing how you enjoy them!
why do you have to cut out the stems??
You cut out the stems because they are quite tough and sinewy. I can only surmise, if you wanted to use every part of the plants (leaf), you could boil the stems by themselves and puree them (and I mean puree the h&ll out of them) and feed them to your dog or put some in your smoothie. But they work really well in your compost bin as well. Good luck. 🙂
I preserve my fresh basil, parsley, oregano by them blending then in my food pro adding a little H20. I then freeze in ice cube trays. after they are frozen, pop them out and bag. These store in the freezer and keep that beautiful green/fresh appearance. I then use them for soups, sauces as needed. Take some basil cubes out, defrost and make a fresh batch of pesto…anytime. Also…I do make pesto and freeze.
Raw or cooked is up to you. The “live food” movement prefers everything raw but I have found some greens like mustard greens taste better to me if blanched first. Test and see. I do this with all greens, even a variety of lettuce types.
We always do so well with greens (growing all kinds) that I had to learn how to eat them. I never had “slimey greens” (in the crock, we sub with turkey sausage ;)) before moving south either. I like them, everyone else…not so much.
I canned a lot of them this year getting some great recipes and ideas from The Bayou Gardener…
http://www.clearcreekseeds.com/the-bayou-gardener/
(He has a bunch of you tube videos.)
I mixed some with onions and carrots in a vinegar base that I enjoyed as well.
We eat what we grow so the children will begin the season not liking these things but by the end of a season they are eating it all. It is funny when we go somewhere and my bunch of toddlers are all requesting salad. 🙂
We also dry them and I freeze large zip locks of them too. I use the dried like Deb said, sprinkled on things and the crispy kale is delicious. We also do green smoothies, adding raw kale to almost any fruit.
Another favorite is using the frozen greens , chopped, on homemade white pizza.
I thought I would comment that I DO NOT HAVE KIDS. So the slime factor of cooked down greens is certainly something to consider if you do have children. I like the idea of putting them in bread, have to try that one!
I’ve been drying greens (esp. spinach) a lot lately and mixing them into our bread…my kids never even know they are there! And since they LOVE bread and not greens so much, I don’t feel as guilty letting them eat the bread…I’ve also been grinding up all sorts of dried veggies and putting them into the bread. It works great!
I’m not a big fan of greens boiled down with a ham hock (slimey!) I dehydrate greens, then crunch them up in everything from rice and noodle side dishes to mac and cheese, quiche – just use your imagination. Kids who may not like big masses of (slimey!) greens on their plate, might not mind some green flecks in something they otherwise enjoy.
Greens, turnip, especially, are good cooked all day on low with a piece of salt pork, side meat, or just ham or bacon. We cook a huge ..huge pot of greens every Saturday and eat on them all week for a green vegetable. My grandmother would freeze them in water in freezer containers and eat on them all winter long. I have seen recipes that use turkey necks for flavoring that is lower in fat as well. Just never tried it.
If you have any Kale mixed in there, dip or spray olive oil on them and place on cookie sheet and bake them, make Kale chips with them, good eating!
Stuff them in the blender, add a touch of water as needed to thin just enough to blend. Pour them either into ice cube trays, baggies, or containers. I find one cup portions the best.
These make GREAT green smoothies when added to a berry or melon. My fav is honeydew and greens.
Seeria,
Do you do this with cooked greens, or raw? I love the idea!