Jerry brought home his first deer over Thanksgiving weekend. I was so proud of him! We’ve been out of red meat for a few months now, due to the climbing cost of beef being no longer justifiable to purchase. Having meat again felt like a windfall.
Watching my husband carrying that buck back up to the house filled me with so much gratefulness and pride in his ability to provide for our family. I wanted to take a picture of him with his first harvest, but he explained that he wasn’t proud of killing and didn’t want a “trophy photo”. Which I totally respected.
We try to teach our children to be respectful of the animal and thank it for the life it gave to nourish us, and never glory in taking the life. We put our hands on the deer and thanked him, and thanked God for his provision.
Gutting and Butchering
We hung the deer on the children’s metal swingset frame (which we’d pulled into the woods) and set to work cleaning it. It wasn’t easy for the two of us to hoist the heavy buck up by his hind legs, but we struggled through and managed to secure it with slipknots. We were wishing we had one of those hook thingies that our hunter friend showed us (a Gambrel).
First, we carefully skinned it in order to preserve the hide. I brought the laptop into the woods and pulled up a YouTube video and an article on how to field dress a deer, which we consulted as we worked side by side.
The laptop battery got depleted pretty quickly though, and I was really wishing I had a book on butchering. Jerry had helped a friend clean a deer once, but it has been years since he did it and couldn’t remember exactly how to go about the process without ruining the meat. There are definitely things you want to avoid doing when cleaning an animal, such as puncturing the organs which could spoil everything. Not something you just want to wing.
Jerry and I both wore Cut Resistant Gloves, particularly after watching a video by Misty Prepper. Yikes!!
It took us all day to process that deer. We pulled some folding tables into the yard, placed the pieces of meat in coolers and tubs of cold water, and worked at removing the meat from the bones, skinning off the silverskin, and chopping the meat into packageable pieces.
The bone saw that came in our butchering kit was a piece of junk, and took forever to get through the bones. I’ll have to put a good butcher saw on my list of things to get. I also had a lot of trouble trying to grind the fresh meat in my new meat grinder. (See my update on how to grind fresh meat!)
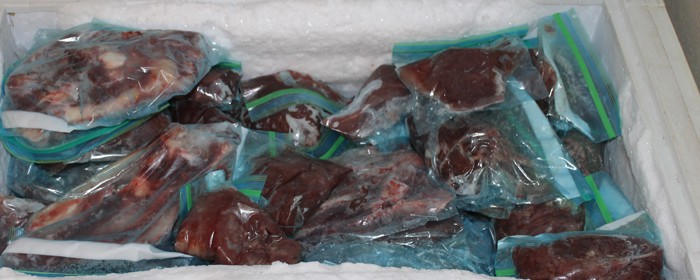
In the end we filled our freezer with 40 lbs of venison. I don’t have a FoodSaver, so we just sealed them up in ziploc bags and pushed as much of the air out as possible by hand. (Usually I suck the air out of freezer bags with a straw, but not with raw meat.) I saved the large bones to make stock, and the organs for dog food.
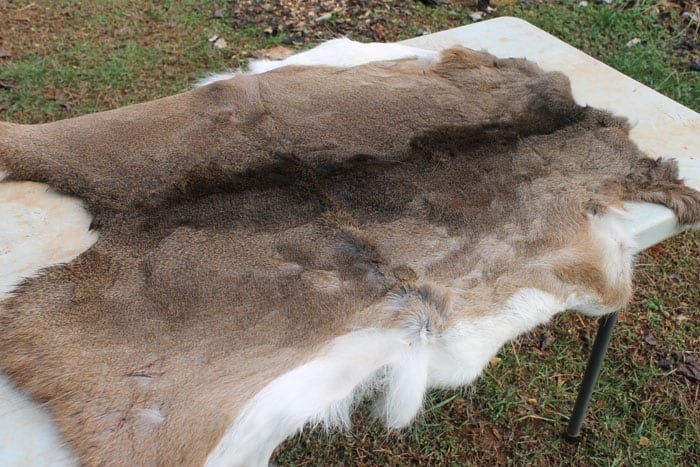
Tanning The Hide
Because it took us all day to get through the meat, the hide was pretty much cast aside for the day.
That night I did some reading up on how to tan a hide, and learned that I really should have worked on scraping it clean and salting the hide right away.
How did the pioneers and Native Americans manage to clean and process a deer AND tan the hide in one day? I wondered. Lots of practice and help, I’m sure.
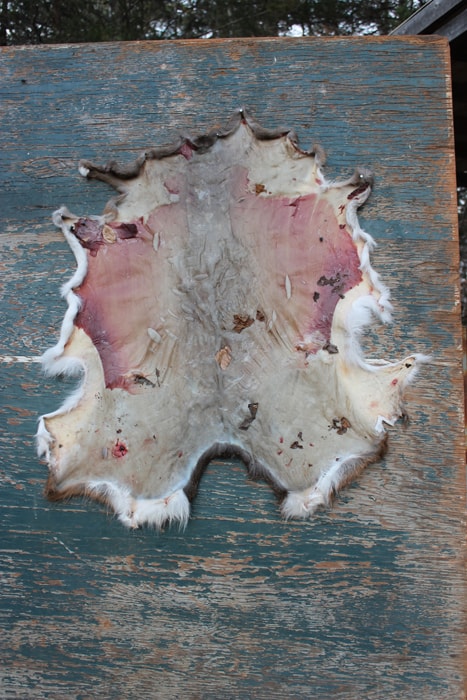
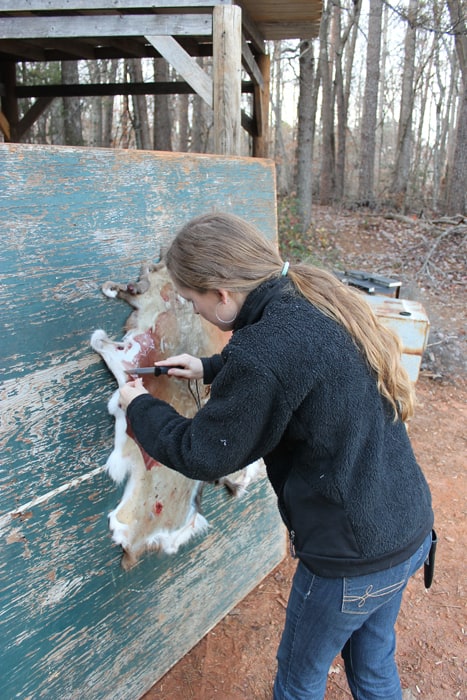
Hopeful that the hide could still be salvaged, I got up early the next morning and set to work on trying to get it clean. First, I stretched it out and nailed it to a board. The hide was heavy, and I found it easier to lay the board flat on the ground and nail it that way instead of trying to nail it to an upright board.
I wasn’t sure what I should use to tack the hide to the board, so I just nailed it up with finishing nails (hoping not to make big holes in the hide). You want to stretch it out as tightly as possible, so that it doesn’t wrinkle.
There were leaves stuck all over the skin where we’d dropped the hide in the woods. They were nearly impossible to peel off after having dried on overnight.
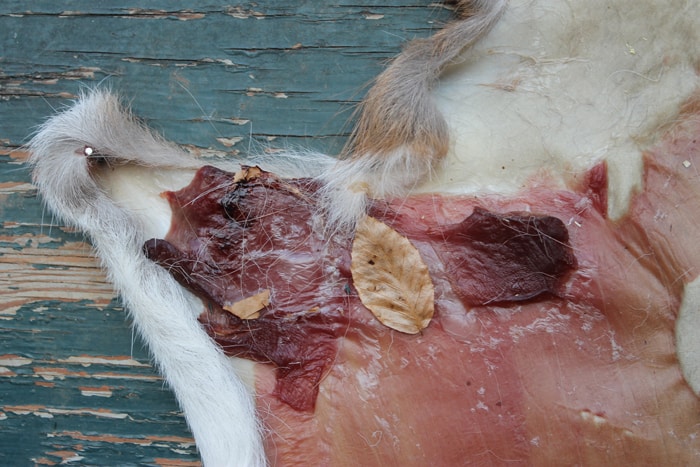
There were still some thick chunks of flesh that needed to be scraped off. As well as plenty of skin to remove. You’ve gotta get every bit of that off the hide, all the way down to the porous layer just beneath the hair roots.
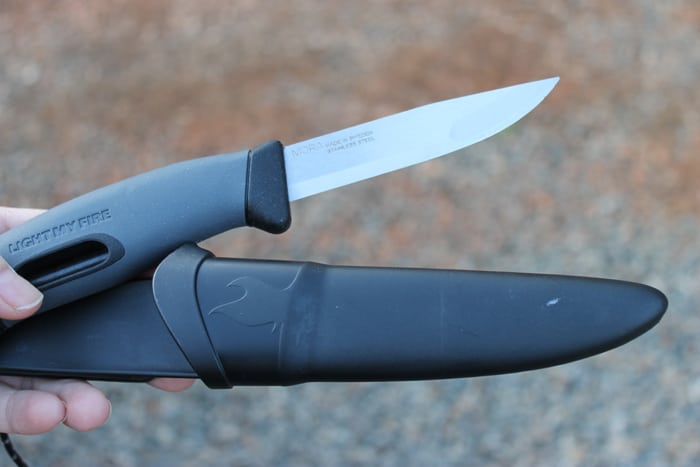
I used a Stainless Steel Swedish Morakniv Knife, which I’d also used to clean and process the deer. LOVE this knife.
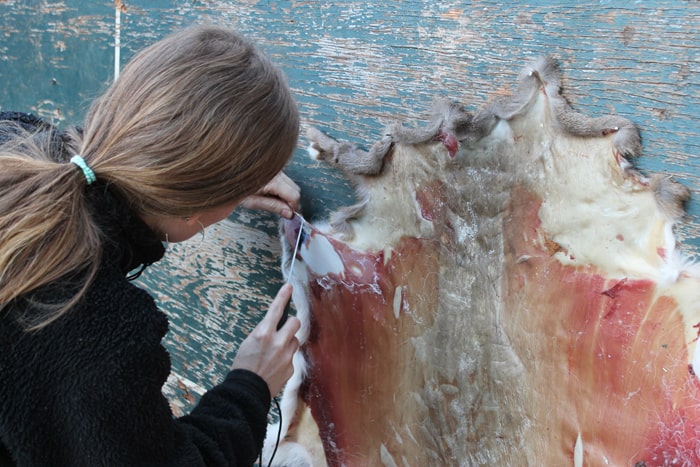
Where the flesh was thick, it was wet enough that I was still able to get underneath it to peel it off. Unfortunately though, the rest of the hide had started to dry and was nearly impossible to skin.
I worked and worked, trying my best to scrape the dried flesh from the hide. But my knife kept getting too deep and I was cutting into the fur. I tried spraying it with a spray bottle of warm water to soften the flesh, but it only got slimy. Eventually, I gave up. Flies and yellow jackets were beginning to gather. Won’t the flies eat the flesh off the hide for me? Or would they just bring maggots?
I was so disappointed that it wasn’t working out.
Then the rain came.
The hide has been out in the rain for three days now. Maybe the flesh will be soft enough to scrape now that it’s soaked? When the rain stops I’ll go check it out and see if I can still salvage the hide.
Any tips from expert tanners out there? Is the hide a lost cause at this point?
If anything, at least I’ve learned a few things. Hopefully next time we’ll be able to process the meat quick enough that I can get to the hide the same day.
Have you ever tanned a hide?
You Might Also Enjoy:

A city girl learning to homestead on an acre of land in the country. Wife and homeschooling mother of four. Enjoying life, and everything that has to do with self sufficient living.
Hey Kendra just checking in to see how ya’ll were doing. We lost a milk cow a few years back and Ian wanted to tan the hide to have something to remember her by. We found a special scraper that we bought at an auction that he used to scrap of the extra meat on the hide. In the end I don’t think he found that to work. He broke a mason jar lid and used that on part of it. You use the broken side to scrape.In the end he found the knife eaiser. He used t sideways like you are shaving it. It was a long and tedious process. Especially since his first hide was a cow 🙂 He used a mixture of borax and alum. He kept the hair on. He had it in his room for a longtime as a rug. A great book to check out is Wildwood wisdom. Not much that book doesn’t tell you when it comes to these sort of things.
Way to go on trying to tan the hide. I think you should always feel a little bad when you kill an animal. I always tell my kids the day you don’t feel bad about killing a chicken is the day you have a problem. Keeps us from being wasteful. You don’t throw out the hide when you had to kill the animal. You keep the chicken feet from the chickens and use in stock. If we have to kill an animal lets respect the provisions of God to use everything he has provided for us. Don’t give up maybe the yellow jackets actually helped by caring off some of the meat. Less for you to scrape 🙂 I think flies are the enemy. But as cold as it is getting at night I would not worry too much myself. After scrapping the fat we sprinkle it in salt. I use canning slat that we get cheap from Chef Smart. I would go back and try to finish it and use it for something even if it is a rug on the floor. If all else fails it can at least be used on the floor of an outdoor fort for the kids. Take care.
So good to hear from you, Taya! I love all of your ideas and thoughts. Thank you! I really love the idea of using the hide in the kids’ fort. It may just end up there. 😉
I have found that wrapping the meat in freezer paper, then sealing it in a ZipLoc bag works well for me.
You can fold the hide and put in a garbage bag and pop in the freezer until you have the time and info. to tan.
There are many different tanning techniques.
Do you think it’s too late, since it’s been hanging outside for like a week now?
Definitely field dress in the woods. Save the hubby’s back!!!
We also cut ours into quarters and put in a cooler with ice and salt. It really does help with the gameiness and pulling out blood. Hubs leaves the plug open so it’ll drain and we keep topping it with ice. You can go up to 7 days or so as long as it stays on ice. Hubs likes to cut it off the bone one night and grind the next morning (we put it in frig at this point). Meat grinds better when it’s really cold.
We finally broke down and bought a grinder about 5 years ago. It has more than paid for itself. Two years ago, we got a cuber. Best investments we’ve ever made when it costs $75 to process one. We usually harvest 4-5 deer a year for our family of 5 and we run out every year!
I’ve never tried tanning but I’ve thought about it. Maybe next year after I do some research. Deer season is almost over. But from 2 deer this year, we’ve gotten 40 packs of ground and 6 packs of cubed (our focus has been ground so far. If we’re blessed with another this year, we’ll do cubed and sausage.)
Good luck with tanning!
I didn’t even know there was a cuber. Thanks!!
I just finished a deer hide I left the fur on so it can hang on our wall. I used the brain from the deer to brain tan it and it took lots of work stretching it till it dried. You need to continue scraping it does take time and holes can be repaired if your leaving the hair on
I didn’t learn about brain tanning until we’d already buried the remains. Next time!! 🙂
next deer have your husband carry a knife and field dress in the field. It will be so much easier to carry home and also to handle with all the insides already out. When we tan hides we use 20 mule team Borax. For first deer sounds like you did a great job. Do you have a Kitchen Aid Mixer, the attachments for grinding work like a dream. In fact it takes longer to clean the attachments than to grind the meat.
We don’t have a Kitchen Aid. The meat grinder I have (hand crank) was a major pain. The silverskin kept getting clogged up in the grinder and I had to take it apart and clean it every few cranks. Eventually I gave up on trying to grind the meat. I’m definitely looking to buy a good one soon!
We froze the hide so we could work on it later. My boys did the tanning and it looks amazing. It hangs on the wall above their bed. They thawed the hide by soaking it in water and then used a large PVC pipe to scrape the fat off. Once that was done they soaked it in a solution. This is where I don’t know what they did. Somehow they figured it out. My boys are 13 and 14. Please feel free to e-mail me if you would like more information. My boys do all sorts of hides, skunk, coon, rabbit, and squirrel.
That’s awesome, Bekki! Then that gives me hope. Maybe the rain will have the same effect as the soaking your boys did. Thank you for sharing!
I’ve not attempted to tan a hide, though I would love to try at some point. I have stretched fresh hides over wooden chair frames, then hung the chairs up in the storage building to ‘cure’. The first one wasn’t so good, but the second one has made an amazing full haired seat. However, I would like to share how we handle our fresh venison. First, after skinning and gutting, we quarter the meat, (shoulders, hams and ribs, as well as backstrap, tenderloins and neck meat) and we place this in ice chests filled with cold water and salt, topping it off with ice when done. This whole process takes about an hour. We allow the meat to soak for as much as three days, draining the bloody water from time to time, adding fresh water and more ice, but always making sure the meat is covered. The water and the salt help pull the blood and ‘wild’ taste from the meat. When we get ready to cut the meat up, my husband ‘hulls’ it all out, removing it all from the bone. Part of the meat is cut into tender steaks and I put them in Ziplock bags for the freezer. The less tender cuts are cut into chunks which I then ‘can’ in quart jars and cook in a pressure cooker. The steaks can last for about a year in the Ziplock bags in the freezer, but the canned meat can last for much longer.
Jennifer,
That sounds like a very good process. It’s probably nice to break up the work into pieces like that. Thanks for the tip!!
I am not one to rain on anyone’s parade, but I can’t believe all the steps that are taken to preserve venison, fresh venison……I do NOT know what the deer that you harvest, eat. But I would give up on processing deer if I had to go thru those steps that you take….Our deer is field dressed, skinned very quickly(within 12 hours at the most) for that is where the wild flavor comes from and from the fat that the deer has accumulated for winter ….That is also taken off. No, soaking anything…….We then cut it up into the appropriate cuts, with no bones left in meat. Grind a certain percentage for venison burger to make into meatballs, meatloaf, or sloppy joes……no wild flavor. and packaged the correct way, (double wrapped) will last more than a year easy in freezer….I grew up with the venison being aged(with the hide on) I can tell you, this person hated the wild flavor and would not eat it. Our deer do have access to acorns and depending on how far their range is, have access to corn. AND the meat is yummy with this simple method.
Both my husband and I come from a long line of deer hunters and both of our families have processed deer meat in this exact same way. Works great and the meat tastes wonderful and lasts for at least a year in the freezer. The only difference we have is we freeze the “chunks”, as well, rather than can them.