If you’ve ever asked yourself how to butcher a chicken, you’re not alone. The process can seem daunting, but it’s actually quite simple.
In this blog post, we’ll walk you through the steps of butchering a chicken so that you can understand the process and feel confident doing it yourself.
Ready to get started? Let’s go!
How Old Should Your Chickens Be When You Butcher Them?
The answer to this question depends on a number of factors, including the breed and purpose of the chicken.
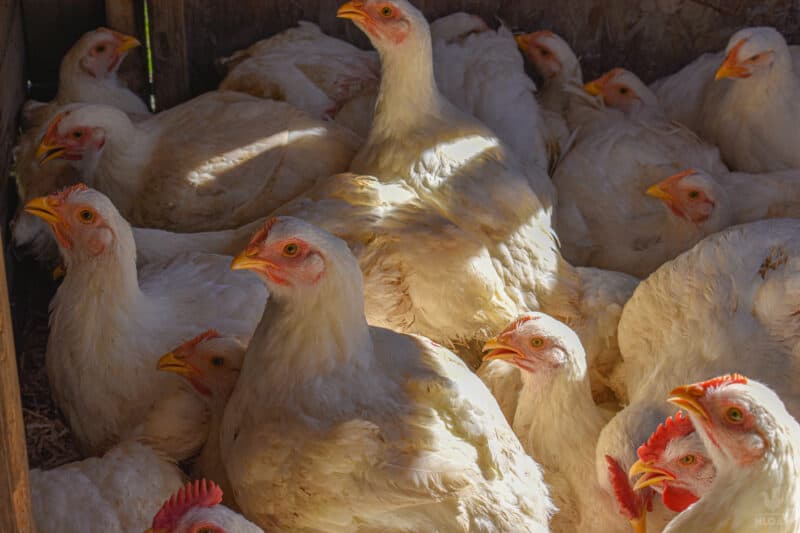
In general, however, most chickens can be butchered safely at around eight weeks old. At this age, they will have reached their full size and will have sufficient flesh to make a good meal.
We butcher our Cornish Cross birds when they are right around six to eight weeks of age.
It’s important to not wait too long to butcher these meat hybrids since they are susceptible to heart, leg, and joint issues if they get too old.
Heritage breed chickens, on the other hand, require more time to reach maturity. You may wish to butcher these birds until they are five or six months of age.
However, it is important to note that the taste and texture of the meat may vary depending on the age of the chicken.
For example, the younger chicken will be tender and more flavorful, while older chicken will be tougher but moister.
As a result, it is important to consider your preferences before deciding when to butcher your chickens.
What Equipment Do You Need to Butcher Chickens?
Butchering chickens can be a messy process, but with the right equipment, it can be relatively simple and straightforward.
Killing Cones
A killing cone is a device used for slaughtering chickens. The cone is placed over the chicken’s head, and the chicken’s neck is inserted into the narrow end of the cone.
This allows the chicken to be hung upside down in a humane way, which keeps it calm and prevents it from struggling.
Once the chicken is in position, its throat can be slit quickly and efficiently. Killing cones are an essential tool for any butcher who wants to ensure that their chickens are slaughtered humanely.
We make our own out of old plastic jugs, but you can also purchase these (they’re usually made out of stainless steel).
Buckets for Innards, Feathers, Blood, Etc
There is a certain amount of special equipment that is needed when butchering chickens. This includes buckets for the innards, feathers, blood, and any other waste products.
You will need to position one of these under each killing cone. You’ll also need separate ones for the feathers, blood, guts, etc.
We use large drums or barrels for this since we butcher around 50-150 chickens at a time.
Hoses and Sprayers
You will need a high-pressure hose and sprayer. This is important for washing away any blood or feathers that are clinging to the chicken.
Poultry Processing Tables
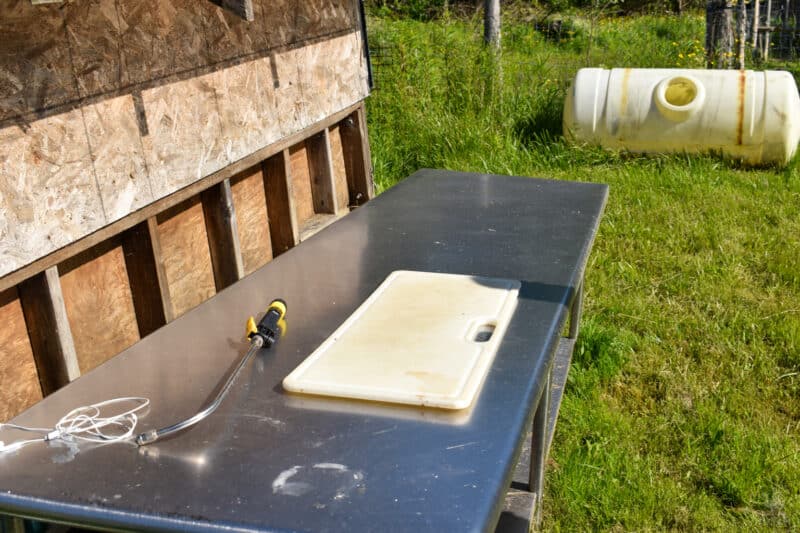
You will need a table (at least one, we use two) where you can do the actual butchering. This table should be clean and have a smooth surface so that the chicken can be easily cleaned.
We were lucky enough to be given a stainless steel kitchen prep table that was going to be thrown out.
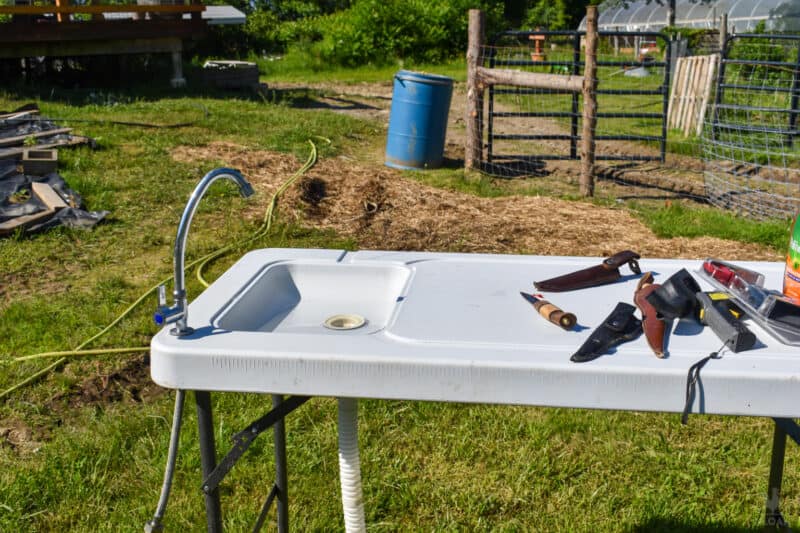
Table With Rinse Sink, if Possible
You will need a source of running water. This can be a hose or a bucket filled with clean water.
For us, it made the most sense to purchase an inexpensive fish cleaning table and use that as our rinsing and cleaning table.
It can be hooked up to a hose so you have a rinse sink to clean the chicken along with a work surface that’s easy to sanitize.
Cutting Board
You will need at least one cutting board. Use one that is easy to sanitize – this is a messy job!
Scalder
You will also need a scalder. This is a small tank of hot water that is used to loosen the feathers on the chicken.
The first few years, we improvised and did not use a scalder. We just dunked the chickens in a pot of hot water that we kept having to run inside to heat back up on the stove.
Now, we use a turkey fryer hooked up to a propane tank so that the water remains continuously hot.
This is important for both the feather removal process as well as later on, when you seal the heat shrink bags (if you choose to use these).
Plucker
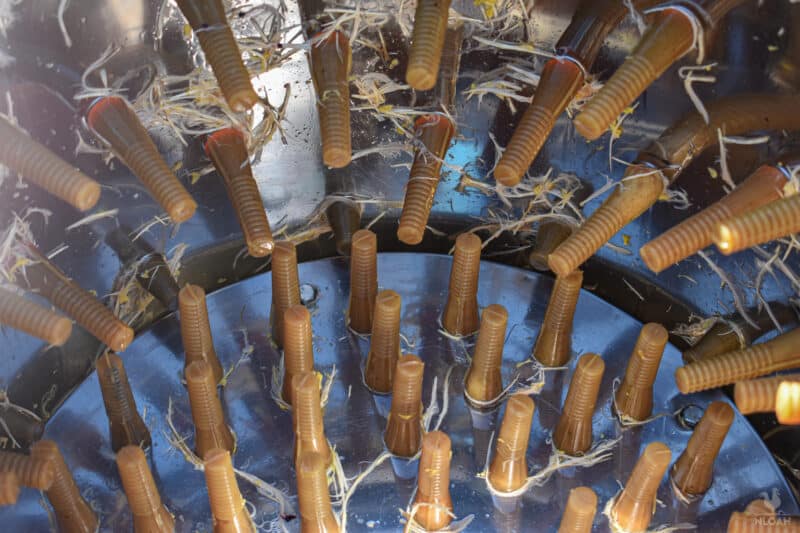
You will need a plucker. This is a machine that spins the chicken around, removing the feathers in the process.
There are countless styles of pluckers available, including drum and tabletop pluckers. When we first started butchering chickens, we used a tabletop plucker.
Although it’s much better than plucking by hand, the downside of a tabletop plucker is that it takes forever to get through all of the chickens.
With a drum plucker like we have, you can pluck multiple chickens cleanly and neatly all at once.
Heat Shrink Bags
When it comes time to package your chickens up for the freezer, you have quite a few different options.
We sell many of our meat chickens, so we needed a way to process and package the birds cleanly that not only impressed our customers but also was sanitary and within the letter of the law.
We use heat shrink bags that seal and remove excess air. I’ll give you detailed instructions on how to use these later in the post. They come with labels so everything is nice and tidy.
Cooler or Tub With Ice
After cleaning and processing your chickens, you’ll need to keep them cool while you do the rest.
We chill our chickens in a large tub with a hose insert that allows the cold water to continuously recirculate, meaning the chickens never get warm. You could also accomplish this by using a cooler filled with ice.
Thermometer
You will need a thermometer to test the temperature of the water for your scalder.
Several Sharp Knives
You will need at least one sharp knife, if not multiple. I recommend having multiple knives on hand so that you can switch back and forth as needed.
We usually have one on hand to dispatch the chicken, one for removing legs and heads, and one for evisceration.
Dish Soap
When you scald your chickens, it can be tough to loosen the feathers enough for plucking. Adding a few drops of dish soap to the scalding water can help.
Extra Rags and Bleach
Finally, you will need some cleaning supplies on hand. A few rags and bleach are all it takes!
How to Butcher a Chicken: Step By Step
Butchering a chicken is not as difficult as it may seem. With a sharp knife and a little bit of practice, you can easily butcher a chicken at home. Here are the steps that you need to follow.
1. Prepare the Processing Area
Before you begin butchering your chickens, it is important to set up a clean and efficient work area. This will help to ensure that the meat is safe to eat and that the process goes as smoothly as possible.
First, choose a location that is close to a water source. You will need to have running water available for cleaning the chicken carcasses.
Second, gather all of the necessary supplies, including knives, numbing spray, and plastic bags.
Third, set up a table or other surface for butchering the chickens. It is important to make sure that this surface is clean and level.
You may also want to put on rubber gloves and aprons to protect yourself from bacteria and other contaminants.
2. Prepare and Catch the Chickens
Next, you’ll need to get your chickens ready to go. I recommend withholding feed the night before you plan to butcher.
Not only will it make the chickens easier to catch, since they’ll flock to the feeder once you fill it, making them easy to grab, but it also reduces the mess during processing since they have less food in the crop.
We raise our chickens in chicken tractors, so when it’s time to catch the birds, we move the chicken tractor (our tractors are moved daily anyway, so this is just part of the process).
The chickens naturally move forward in the tractor and we provide them with feed to entice them to congregate where we need them to.
Then it’s just a matter of grabbing them and putting them in our wooden box (a holding pen, if you will), then moving the box to our processing area where they await slaughter time.
3. Put the Chicken in the Kill Cone
A killing cone is a device that holds the chicken in place while you slaughter it. To use a kill cone, first select your chicken.
Next, hold the chicken upside down by its legs and insert its head into the wide end of the cone.
Then, pull the chicken’s body through the cone so that its head sticks out of the small end.
4. Cut the Jugular
Chicken farmers typically use one of two methods to humanely kill chickens during processing.
One of the most common methods is to cut off the chicken’s head. However, this method can be quite messy, as blood often spurts from the chicken’s neck.
In addition, it can be difficult to ensure that all of the chicken’s brain stem is severed, which can result in the chicken suffering for several seconds before dying.
The other common method is to cut the chicken’s jugular. This method is much cleaner, as there is very little blood loss.
In addition, it is almost always immediately fatal, ensuring that the chicken does not suffer unnecessarily. That’s why we choose this technique.
5. Let the Chicken Bleed Out

After you have killed the chicken, it is important to let it bleed out.
This will help to reduce the amount of blood and gore, and it will also allow the chicken to go through its death throes in a contained place, inside the kill cone, so it doesn’t flop all over your yard.
After slicing the jugular, let the blood drain into a bowl or bucket. You can then dispose of the blood at the end of the day (I know some people use it on their gardens).
As a general rule, it is best to let the chicken bleed out for at least five minutes. This will ensure that all of the blood has been drained from the body and that the meat is safe to eat.
It will also reduce the likelihood of an errant spasm while you are trying to scald and pluck the chicken!
6. Scald the Chicken
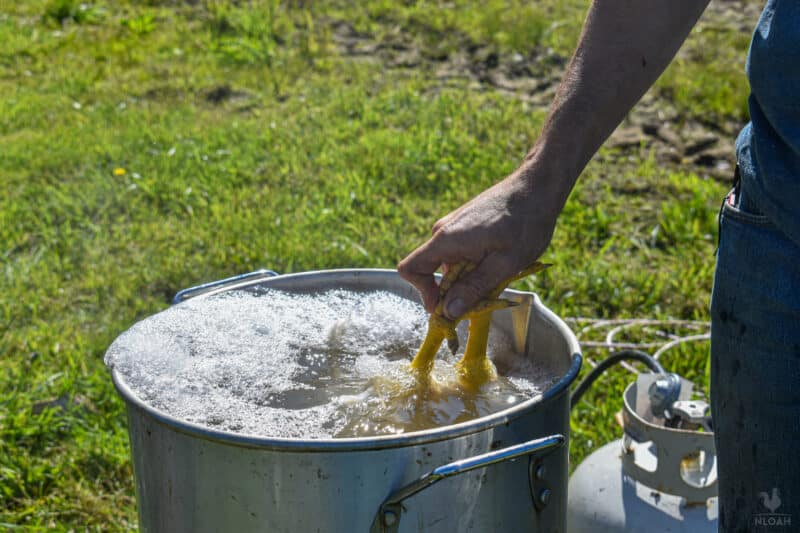
Scalding a chicken is a process of immersion in hot water that loosens the feathers and makes them easier to remove.
The ideal temperature for scalding is between 140-160 degrees Fahrenheit, which can be achieved by heating water on the stovetop, or again, by using a scalder or turkey fryer.
To scald a chicken, first fill a large pot with water and heat it until it reaches the desired temperature.
Then, carefully lower the chicken into the pot and allow it to soak there for a few minutes (three or four).
Don’t let the chicken sit in the scalder too long, or the skin will start to pull away as you pluck. This leads me to the next step…
7. Pull a Few “Test” Feathers
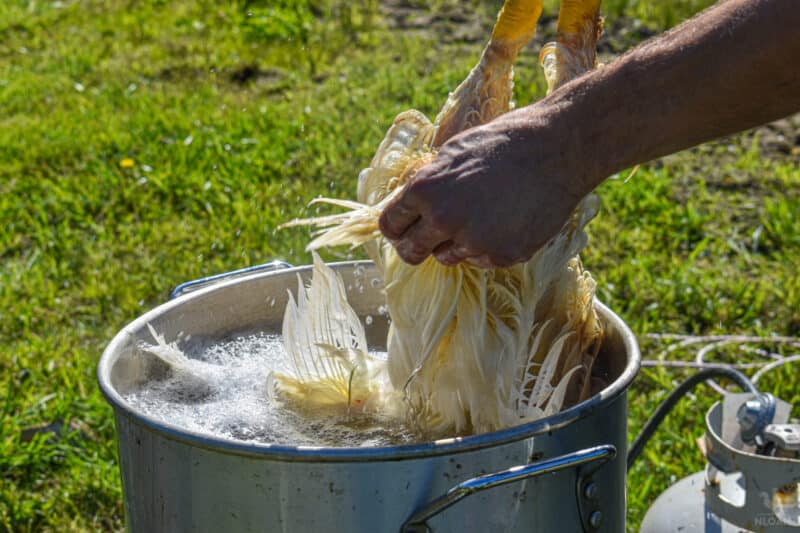
When scalding a chicken, it is important to pull a few test feathers to ensure that the water is the correct temperature.
If the feathers come out easily, the water is too hot and could damage the chicken’s skin. If the feathers are difficult to remove, the water is not hot enough and will not effectively loosen the feathers.
8. Pluck the Chicken
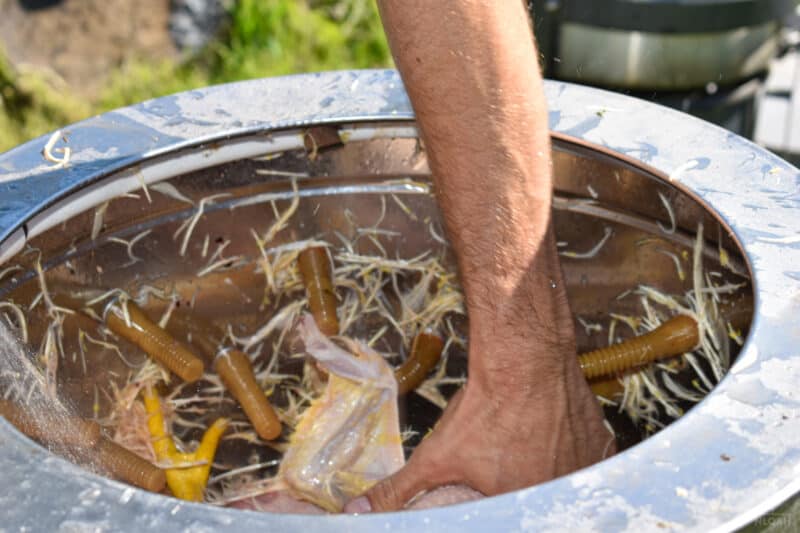
Place the chicken in the center of the drum. Then, turn on the plucker and wait for it to rotate at full speed.
The rotating action will cause the chicken wire to rub against the fingers of the machine, loosening them from the skin.
After a few seconds, the feathers should be completely removed and the chicken will be ready for evisceration.
Plucking a chicken using a drum plucker is a quick and efficient way to remove its feathers. The main advantage of this method is that it can be done relatively quickly and with little mess.
Additionally, it requires no special skills or knowledge, making it an ideal option for those who are new to chicken slaughtering.
However, one downside of using a drum plucker is that it can sometimes damage the skin of the bird.
This is particularly true if the machine is not used properly or if the chicken is left in the plucker for too long.
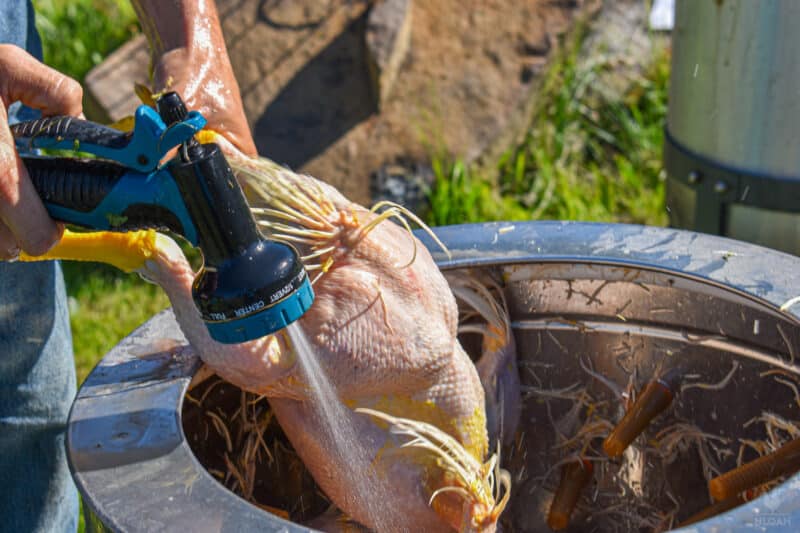
One technique that can help with this is to spray water in the plucker while you’re plucking the bird.
It loosens the feathers better, helping you remove them from the chicken with less mess, while also keeping the feathers from sticking to the inside of the plucker and reducing its overall effectiveness.

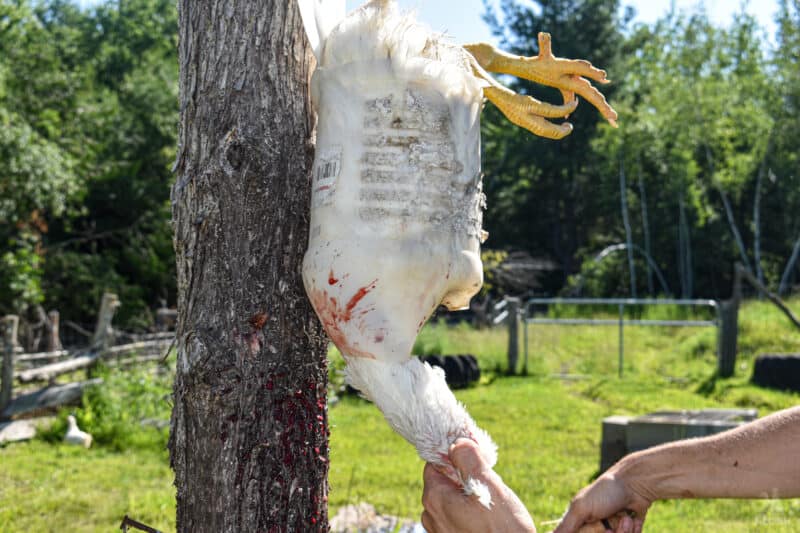
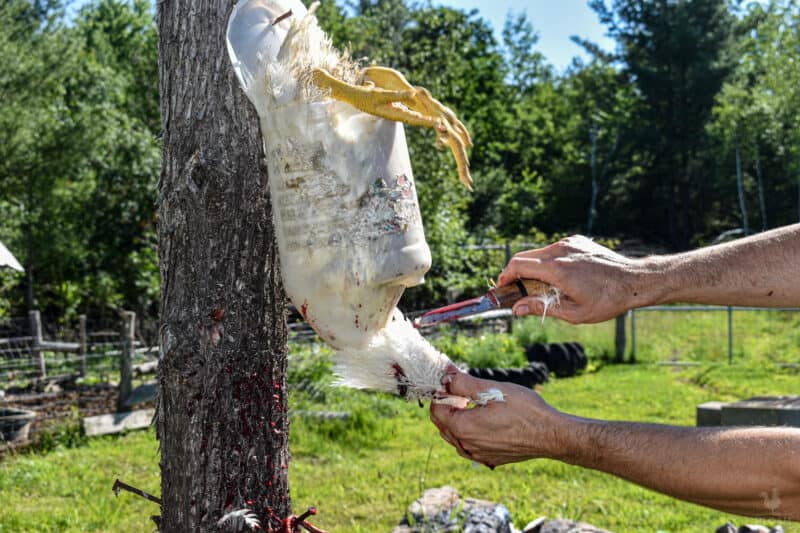
9. Cut Off the Legs
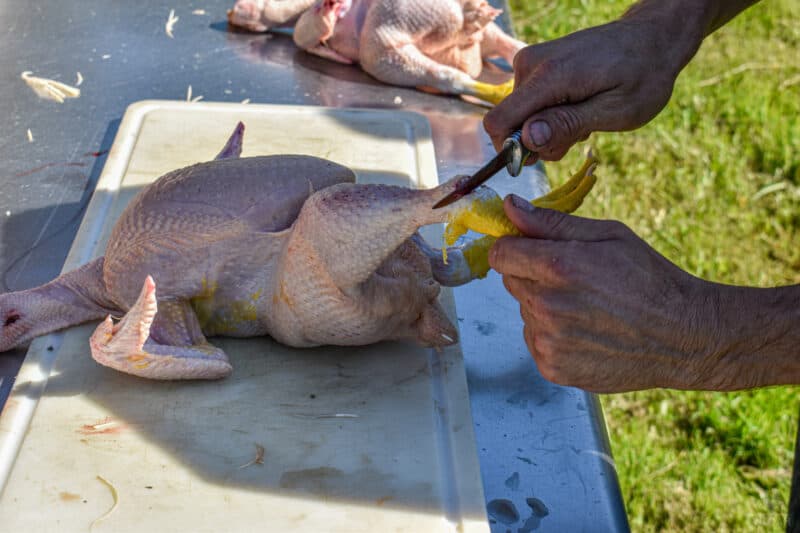
Remove the feet of the chicken by cutting through the ankle joint. Discard these, unless you plan on using them to make chicken stock.
10. Cut Off the Head
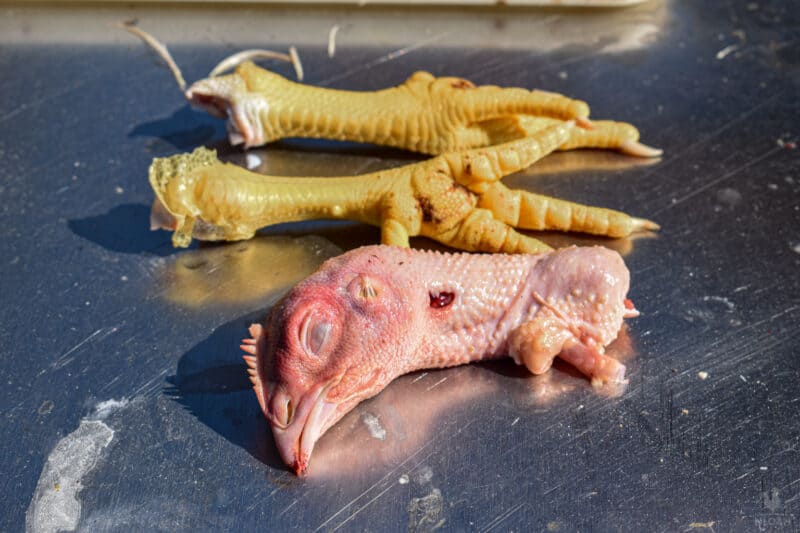
Next, you’ll cut off the head. To do this, I recommend tugging gently on the neck to help pull up some of the windpipe and loosen the crop (this will make the gutting process easier in a minute).
Then, cut through the neck. Snap the spine in your hands (this is pretty easy to do by hand but you may need to twist a bit or use a pair of clippers to get all the way through it). Discard the head.
11. Cut an Opening WIthout Rupturing the Oil Gland
Next, you’ll need to cut an opening near the chicken’s vent area. Be careful doing this so that you don’t rupture the oil gland.
This can contaminate the meat and also make you more likely to rupture other organs and get manure everywhere. The best way to do this is to cut down and then twist the knife outward.
12. Remove the Crop, Windpipe, and Esophagus

Your next step is to remove the crop, windpipe, and esophagus. To do this, reach in down through the neck and pull out the windpipe.
It can sometimes be challenging to get the whole thing from this angle, so you may also need to get some from the other entrypoint.
Next, cut through the connecting tissue to remove the crop and gizzard. The crop is a sac located at the base of the chicken’s throat that stores food.
The gizzard is a muscular organ that grinds food. Again, you can discard these parts or save them for another use.
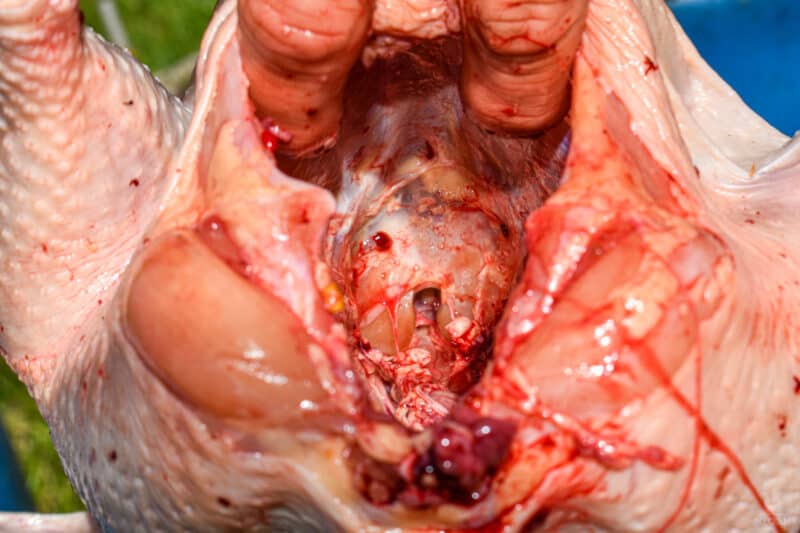
13. Remove Internal Organs (Be Careful With the Lungs)
Start by cutting through the skin around the chicken’s vent. Once you’ve cut through the skin, you’ll be able to see the chicken’s intestines.
Using your fingers or the tip of your knife, gently pull out the intestines, being careful not to puncture them.
Once you’ve removed the intestines, you can discard them or save them for another use.
Get the other organs out. The hardest organs to remove are the lungs, which attach tightly to the inside of the chicken’s ribcage.
They make a specialized tool to remove these, but I find it’s easiest just to scrape them out with my fingernails. Be sure to remove the gizzard, liver, and heart, as well as the crop and intestines.
Once all of the organs have been removed, rinse the inside of the cavity with cold water. Trim away any excess fat.
14. Wash Well
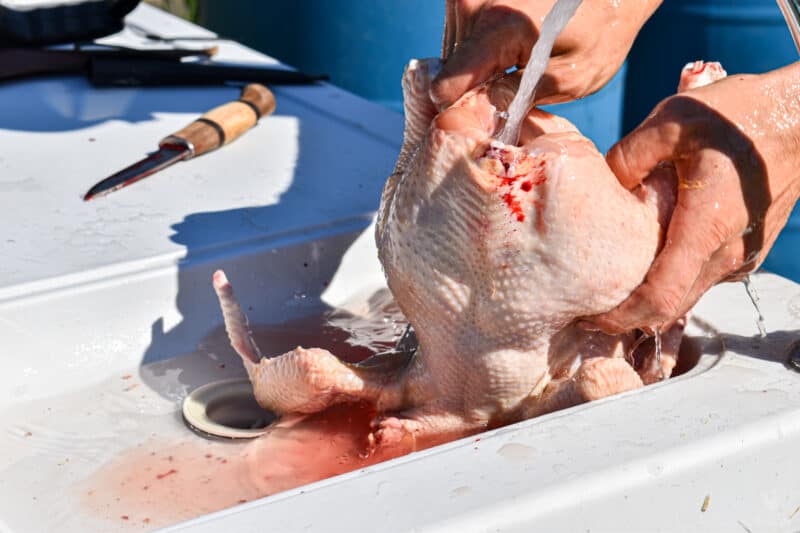
To wash a chicken after gutting it, first remove any viscera or blood from the body cavity.
Rinse the chicken inside and out with cold water. Now is the time to remove any stray feathers or organs you may have missed, too.
15. Chill the Birds (time on this varies for the breed)
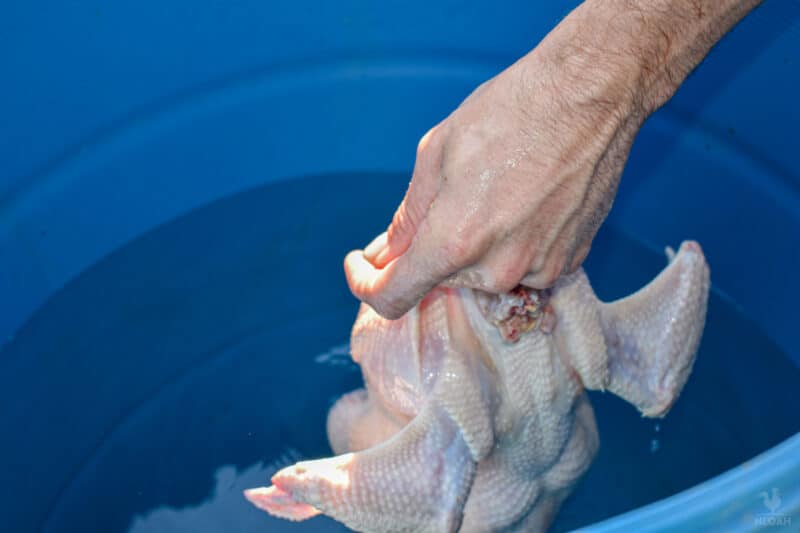
After killing and gutting a chicken, it is important to chill the bird as quickly as possible. This helps to prevent the growth of bacteria and ensures that the meat remains safe to eat.
There are several ways to chill a chicken, but one of the most effective is to place it in ice water.
The ice water will help to lower the temperature of the chicken quickly and evenly, ensuring that it is properly chilled.
Another option is to place the chicken in a refrigerator set to 40 degrees Fahrenheit or below.
However, it is important to keep an eye on the chicken and make sure that it does not begin to freeze. If the chicken begins to freeze, it will become less safe to eat.
As long as the chicken is properly chilled, however, it can be stored in the refrigerator for up to two days before cooking.
In fact, I recommend that you allow your chickens to chill in the refrigerator for a day or two after processing before you package them – only if you are raising heritage birds.
If you raise heritage birds, which are processed when they are much older than hybrids like Cornish Crosses, you will likely find that the meat becomes tough and stringy tasting.
Allowing the birds to chill in the fridge for a few days (or “age”) reduces the toughness because rigor mortis occurs, then the body relaxes.
Otherwise, rigor mortis will set in and then be “locked” in place when you freeze the birds, resulting in tough meat.
We package our birds right away, though, because they are so young when they are slaughtered that the toughness issue is not a concern.
16. Prepare Water for Packaging
Dump the water you used to scald your chickens and get some fresh water heating up.
It will need to be around the same temperature, but I recommend using fresh water because the scalding water will likely be filled with feathers, dirt, manure, blood, and other debris.
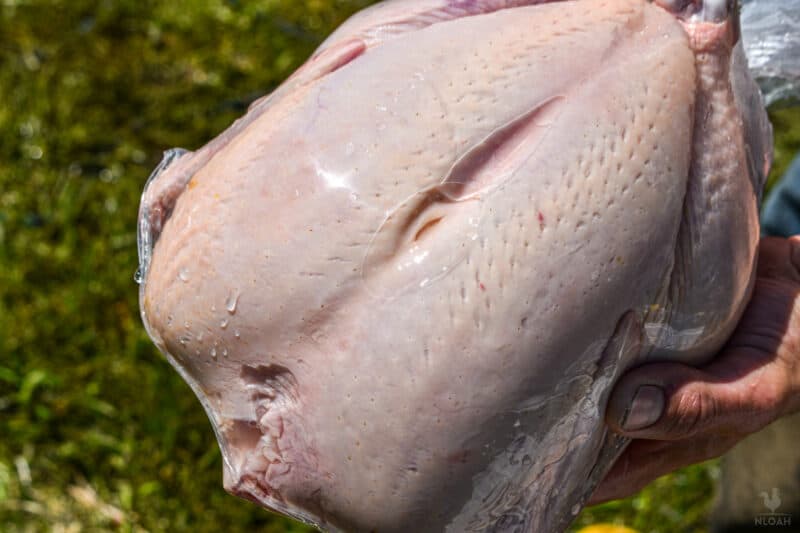
17. Bag Chickens
Your next step is to bag the chickens. Place them in the bag, making sure there isn’t too much water on them (you may need to pat them dry).
The feet should be at the top (opening end) of the bag. Close the bag with a zip tie. Cut a slit in the bag, near the breast area, that’s about an inch long.
18. Dunk Chickens in Scalding Water
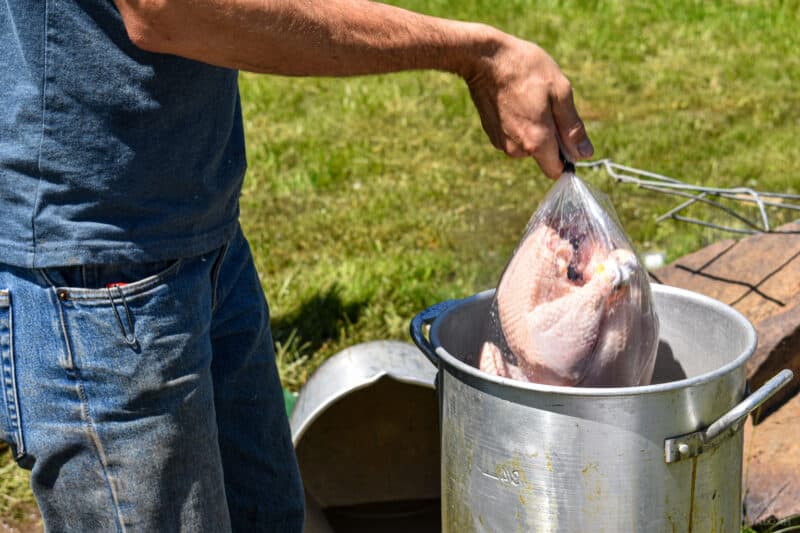
Dunk the chickens, bag and all, into the scalding water. The bag will seal, helping to remove air and ensure that your chickens stay fresh longer.
19. Apply Labels
Dry the area around the slit, then apply a label over the slight.
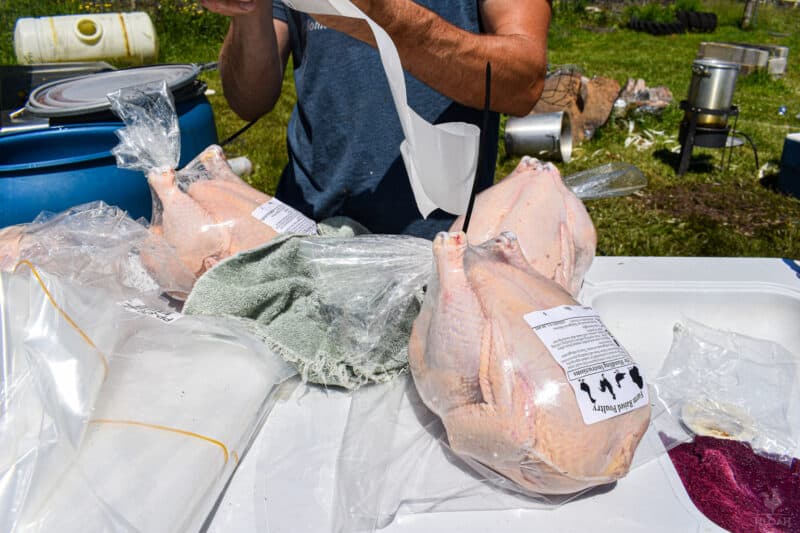
Label the packages with the date, weight, and price (if you’re selling, as we are) of the birds.
20. Freeze Promptly!
Once your chickens are in their sealed bags and everything is labeled, it’s time to freeze your birds! Pop them in the freezer and enjoy – or enjoy now! It’s up to you.
Then, all that’s left is to clean up. Make sure you dispose of the guts, feathers, and other mess in a safe way (I recommend composting!) and clean all surfaces, knives, and other equipment you used to process your chickens with bleach.
Slaughtering a Chicken: Easier Than You Think!
The first time we butchered our own meat birds, it took all day (12 hours) to do 25.
Now, we butcher 100 chickens in about eight hours, from start to finish. That includes time for catching the birds, cleaning up, and so on.
The more practice you get, the less time it will take you to butcher your chickens. I also recommend investing in the right equipment if you plan on doing meat birds long term or raising a lot of them.
For us, having a special cleaning table, dedicated water supply, plucker, and scalder has made a world of difference.
If you are looking for a more hands-on approach to your poultry needs, consider butchering your own chicken.
It is not as hard as it may seem and with a little practice, you will be able to get the most out of your bird.
Enjoy eating fresh local chicken! Have you ever butchered your own chicken? What was your experience like?

Rebekah is a high-school English teacher n New York, where she lives on a 22 acre homestead. She raises and grows chickens, bees, and veggies such as zucchini (among other things).