Winter squash is a family-friendly favorite to grow in your vegetable garden. Easy to grow and very prolific, you’ll love the satisfaction that comes with growing your own winter squashes to eat all winter long.
With enough garden space and growing season, you can grow plenty of winter squash to feed your family.
Growing, harvesting, and cooking these delicious plants is easy for the novice and the experienced grower. Keep reading for an in-depth guide on how to plant, grow, and harvest winter squash.
Winter Squash Basics
Botanical Name
Curcurbita. Winter squash comes from the genus of plants in the gourd family, Cucurbitaceae. They are grown as vegetables and as livestock feed.
Plant Type
Although we typically serve winter squash as a vegetable, they are technically a fruit because you eat the part of the plant that contains the seed.
Growing Season
Winter squash requires a long growing season. It generally requires 75 to 100 frost-free days. In more northern locations, the seeds are typically planted by late May.
In southern areas, they can be planted as late as July. Winter squash harvested in the fall can easily be kept through the winter when stored properly.
Hardiness
Winter squashes are easily killed by frost. They will grow best in air temperatures between 50° to 90° (10-32°C). Flowers drop in higher temperatures, but established fruit can ripen when it is as warm as 100˚F (37˚ C).
The Best Location For Growing Winter Squash
Winter squash needs full sun and lots of space. When you choose the location for your squash patch, select an area that receives at least 6 to 8 hours of direct sunlight per day.
You also need lots of space for the vines to sprawl. Winter squash typically requires 50 to 100 square feet to spread out and grow. But each plant is prolific, so you’ll only need a few of them to feed your family.
When to Plant Squash by U.S. Hardiness Zone
To plant winter squash at the right time, you’ll need to find your hardiness zone.
Once you know your U.S. Hardiness Zone, you can use this chart to get a rough idea of when to start your seeds indoors and outdoors.
Keep in mind that the last frost dates are an estimation and can vary from year to year. The dates below are just an estimate to give you an idea of when to get started.
| Grow Zone | Start Seeds Indoors | Direct Sow Seeds After Last Frost Date and Soil Is Warm |
|---|---|---|
| 3 | April 1-30 | May 1 -31 |
| 4 | March 24 – April 12 | April 24 – May 12 |
| 5 | March 7 – 31 | April 7 – 30 |
| 6 | March 1 -21 | April 1 -21 |
| 7 | February 22 – March 3 | March 22 – April 3 |
| 8 | February 13 – 28 | March 13 – 28 |
| 9 | January 6 – 28 | February 6 – 28 |
Basic Soil Requirements For Squash
For the best results, plant your squash in loose, well-draining soil and rich in organic matter. You can work aged compost or manure into the ground in the fall before planting your garden. Squash does best with a soil pH of 5.5 to 6.8.
Soil Temperature
If you are growing your squash from seed, do not direct sow your squash until the soil temperature reaches at least 65˚ Fahrenheit. However, squash seeds germinate best at a temperature of 95˚ Fahrenheit.
If the soil temperature is above 70˚ and the seeds have adequate moisture, your winter squash plants should germinate in less than a week.
Planting Squash Seeds
Winter squash seeds are large, so plant them about one-half to one inch deep. Under the right conditions, the seeds will sprout in four to ten days.
Starting Winter Squash Seeds Indoors
You can start winter squash seeds indoors about three to four weeks before your last frost date.
However, squash does not like to have their roots disturbed, so the best way to start them indoors is to plant them in biodegradable peat pots.
When it is time to transplant your squash into the garden, you plant the entire pot. As the plant grows, the pots will dissolve in the soil. Using dissolvable pots causes the least amount of stress on your plants.
Place your peat pots in a plastic tray and set the tray on a heat mat to keep the temperatures above 70˚ Fahrenheit.
Place two seeds in each peat pot, about an inch deep. Once the seedlings are over an inch tall, thin them to just one plant per pot.
Make sure you keep the peat pots moist but not soggy. Feel free to cover the peat pots with plastic wrap to keep the humidity stable.
However, you’ll need to keep an eye on things to make sure your plants are not getting moldy or damping off. Remove the cover after the seeds have sprouted.
You can transplant your winter squash into the garden after the danger of frost has passed and the soil is warm. You will need to harden off your plants before you can plant them outside.
To harden off your seedlings, bring them outside for a little while in a protected area when the weather is mild. Bring them back inside to protect them from the evening cold, rain, or harsh winds.
Every day, you will need to increase the amount of time the seedlings are outside. This process takes one to two weeks. Then you will be able to plant your squash right into the garden.
Direct Sowing Squash Seeds
Often, squash does better when it is directly sown into the garden. Unless your growing season is very short, you should have plenty of time to direct sow your winter squash seeds.
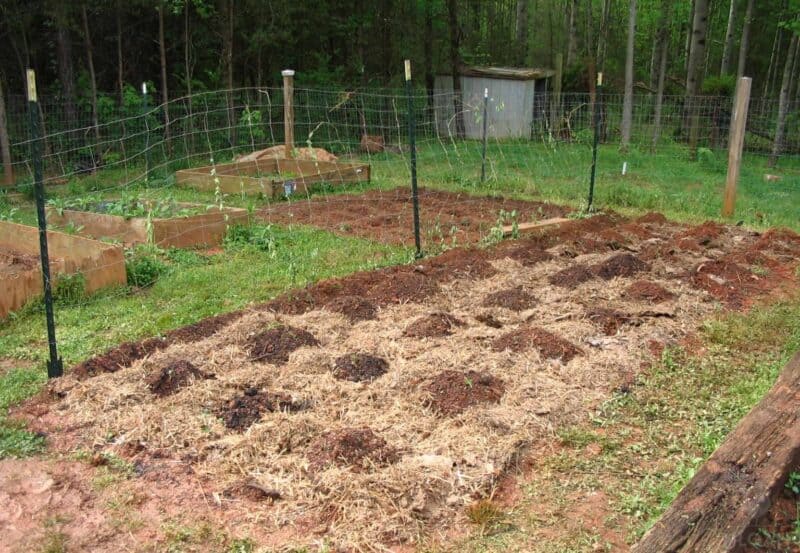
Start by creating small hills or rows in your soil. Rows should be three to six feet apart to allow the plants plenty of room to grow.
When the danger of frost is passed, and the soil is above 60˚ Fahrenheit, plant three to four seeds in each mound. Plant the seeds close together. Seeds should be planted about an inch deep with the points down.
If you prefer, you can lightly work in a tablespoon of 10-10-10 fertilizer in each mound before planting your seeds.
Growing Squash from Seedlings
You don’t have to start your own seeds. If you are short on time or space, you can purchase seedlings from any local nursery or big box store.
In many cases, they will be hardened off and ready to go directly into your garden. However, do not set out your winter squash plants until after the danger of frost is passed. Even a light frost can kill your squash plants.
Plant them three to six feet apart in rows. Water your seedlings thoroughly as soon as you have planted them.
Transplanting Winter Squash
Squash plants do not like to have their roots disturbed. Doing so will cause stress to your plants.
For best results, choose seedlings that have been grown in biodegradable pots so that you can directly plant the pot into the soil. Plant them to the same soil depth as they are in their pot.
Always wait until the danger of frost has passed to transplant seedlings into your garden.
Winter Squash Blossoms
Winter squash blossoms grow as either male or female. The male flowers come in earlier, are flashier, and on long stalks. They help to attract pollinators to the plant.
On the other hand, the female flowers are usually located closer to the base of the plant on shorter, stubbier stalks. Only the females produce squash and only when pollinated by a male flower.
Towards the end of the season, you can prune away extra male flowers so the plant can focus its energy on ripening the fruit that has already grown. Squash flowers are edible and can be stuffed, breaded, and fried.
Companion Planting with Squash
Squash takes up quite a bit of room with their sprawling vines and can smother plants growing nearby.
However, you can companion the plant with certain plants that will deter pests or provide a little afternoon shade in the summer heat.
If you want to try companion planting with your winter squash, you might try corn, peas, beans, marigolds, nasturtiums, and mint.
Watering Squash
Squash plants are large and need a lot of water. They will need to receive at least one inch of water or rainfall each week.
If the weather is hot or your soil dries out quickly, you may need to water more frequently. You can mulch your squash plants to help retain more moisture.
Fertilizing Squash
Before planting your winter squash, you’ll want to mix in lots of aged compost and manure to your soil to make the soil loose and fertile.
You can add one tablespoon of fertilizer to each hill before you plant your squash and fertilize your plants once a month after that.
Be mindful of what fertilizer you use. Some gardeners prefer natural fertilizers such as compost tea.
You can make compost tea by steeping compost in water for 24 to 48 hours, then using the water to spray the soil at the base of the plant.
However, any fertilizer that is too high in nitrogen will cause the plants to focus on growing vines and leaves rather than fruit.
You can use a 10-10-10 fertilizer in the mounds before planting. Use a 5-10-10 fertilizer to keep your plants fed once per month throughout the growing season.
Harvesting Winter Squash
Do not harvest your squash too soon, or they will be more prone to rotting and poor flavor. Check your seed packet for the date to maturity.
While this isn’t an exact date, it will give you a rough idea of when your squash will be ready to harvest. Don’t wait until frost because this will kill your plants and ruin your fruit.
It will probably take more than 50 days for your vines to go from flowers to harvest. Make sure your fruit has reached its mature coloring.
This coloring will vary depending on the variety of squash you planted. Tap on the rind; the thick rind will sound hollow when the fruit is ripe.
Never pull or twist your fruit off of the vine, as this can damage the vine. Instead, carefully cut it cleanly off the vine with a sharp knife or pruning shears. Leave a two to three-inch stem on your squash.
If the weather is warm and dry, you can cure the squash in the garden after harvesting. Just leave them to sit in the sun for seven to ten days to improve their flavor and prolong their shelf life.
If any plants have bruises or damage, eat them first or use them as animal feed. Store well-cured squash in a cool dark place between 50˚ and 60˚ Fahrenheit and 50 to 70 percent humidity. Store them in a single layer, not touching. Check frequently for signs of rot.
Saving Squash Seeds
Properly saved squash seeds can last for up to six years. However, if you are going to keep your winter squash seeds, consider growing only one type of squash to prevent cross-pollination. Cross-pollination can lead to inconsistent results in your next squash planting.
To save squash seeds:
- Harvest the mature winter squash as you usually would
- Allow the squash to sit for one to two months
- Open the winter squash and remove the seeds
- Wash away any flesh or stringy parts
- Lay the seeds in a single layer on paper towels and allow them to dry completely
- Once dried, store them in an envelope in a cool, dry place for up to six years. Any moisture will rot your seeds.
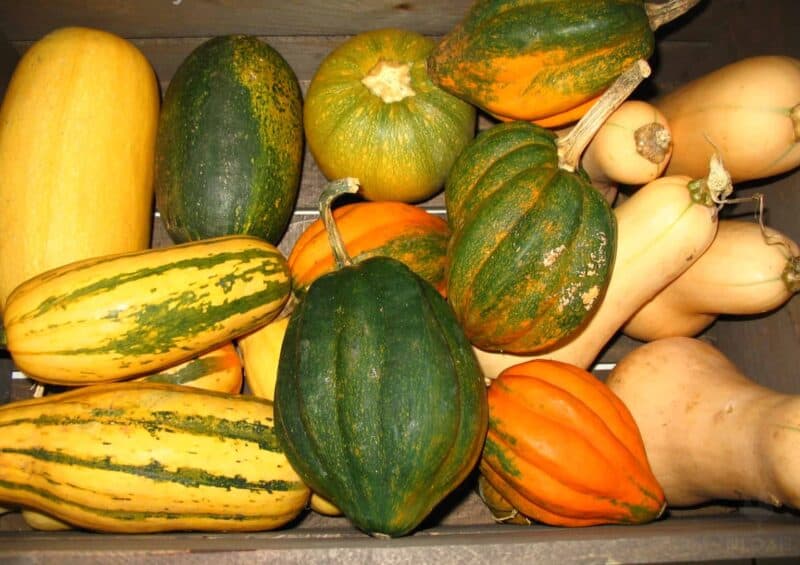
7 Winter Squash Varieties
Winter squash are so named because they have thick rinds and can be preserved for use throughout the winter. There are many different varieties of winter squash.
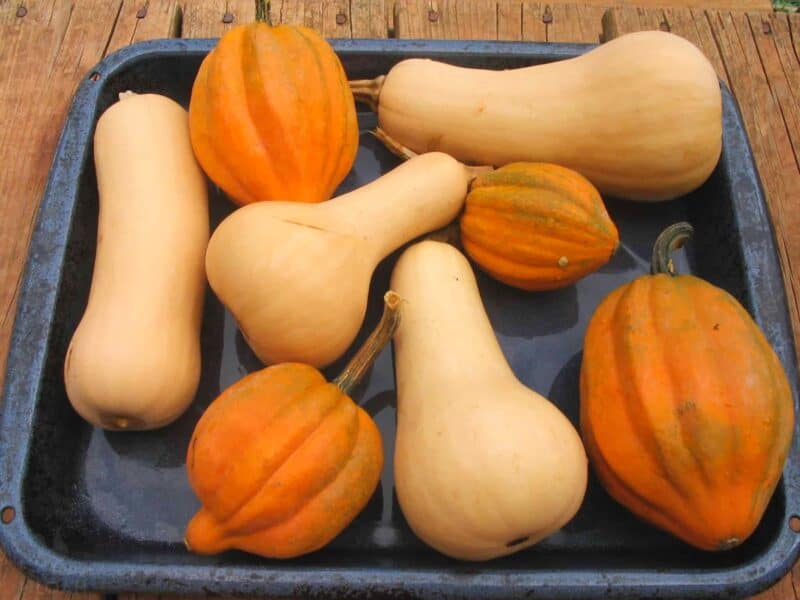
1. Acorn
Acorn squash weighs 1 to 2 pounds. The flesh has an orange color, and the rind is yellow and green.
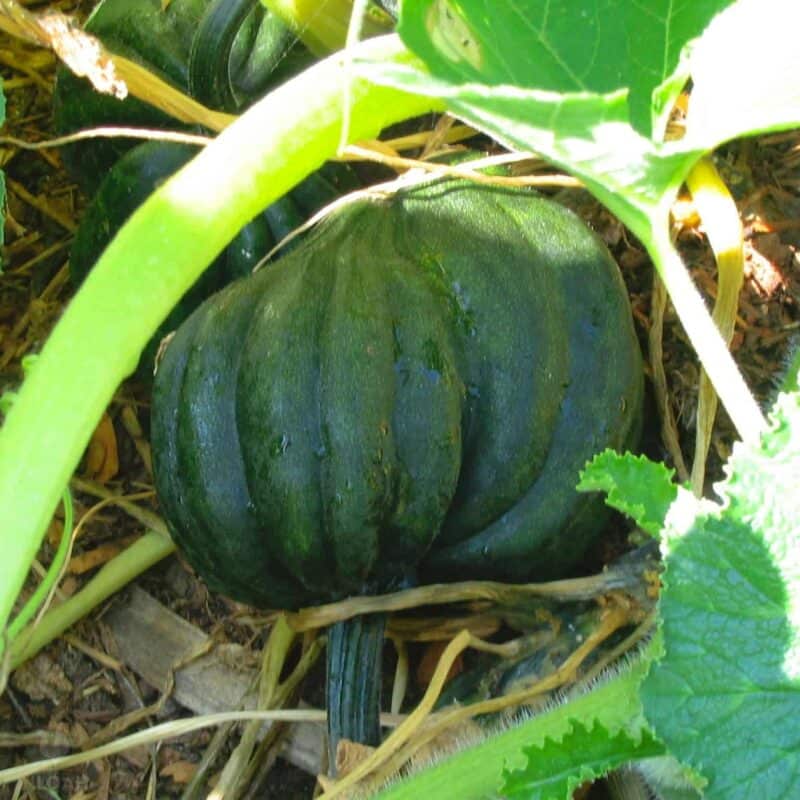
The skin is edible, and it can be roasted, baked, and even microwaved. Acorn squash is ready to harvest in 70 to 90 days.

2. Banana
Banana squash grows two to three feet in length and weighs up to 40 pounds. It can be orange, pink, and even bluish. Use in soups, stews, or roasted. It is ready to harvest in 105 to 120 days.
3. Butternut
Butternut squash is very popular for its sweet flavored orange flesh and low amount of seeds. It is excellent in soups and ready to harvest between 75 and 110 days.

4. Hubbard
This large squash has a tough rind which is usually discarded before cooking. It has a sweet, pumpkin-flavored orange flesh and can be used much like any winter squash.
Hubbard squash has a distinctive green to blue rind and is ready to harvest in 90 to 120 days.
5. Pumpkin
Pumpkins are a variety of winter squash, but some types will store much longer than others. For extended storage, choose a type with a thicker, firmer rind.
Choose smaller varieties that are developed for eating rather than carving for the sweetest, most delicious flavor.
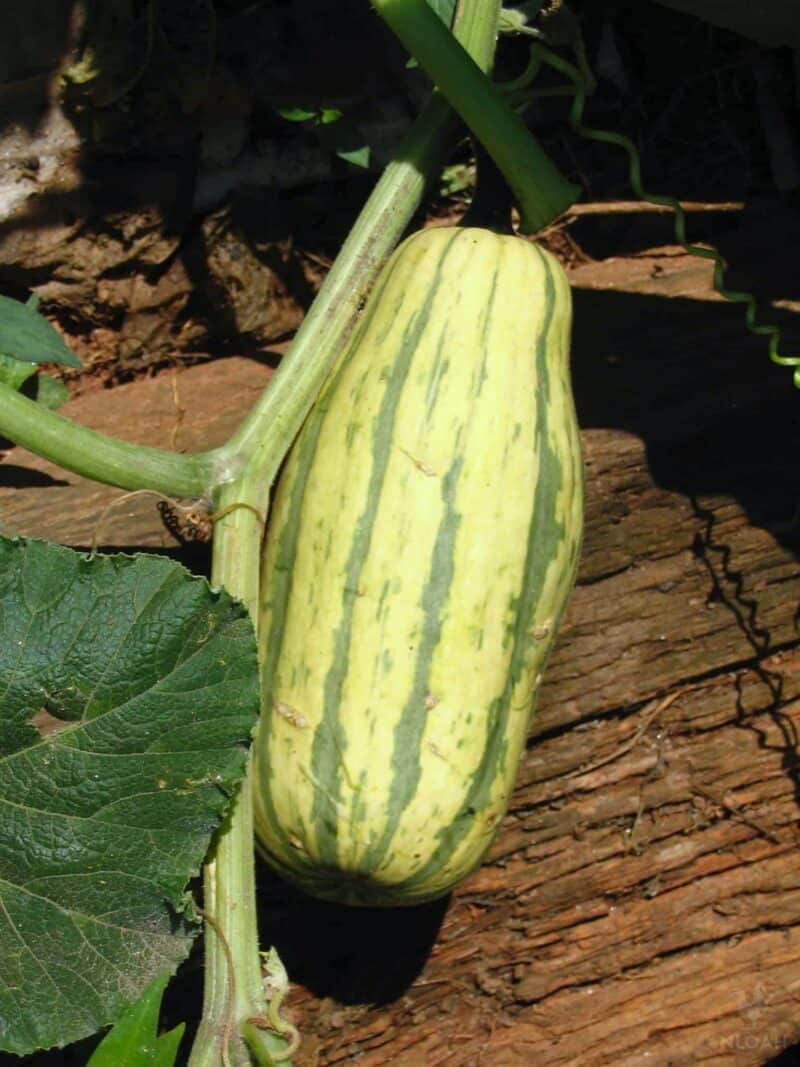
6. Spaghetti
Spaghetti squash has a stringy flesh that is often used in place of pasta. Spaghetti squash has a very mild flavor, making it a great dish to serve with savory sauces. This winter squash is ready to harvest in 90 to 100 days.
7. Turban
Turban squash has a bumpy rind that can be mottled yellow, green, and orange. Its hard rind makes it well suited for use as an ornamental squash, but it can be eaten like other squashes.
The hollowed-out rind makes a beautiful soup bowl. It’s ready for harvesting in 85 to 110 days, depending on the variety.
Growing Winter Squash in Containers
Winter squash can be grown in containers, but bush varieties will work best. You can extend your growing season by planting indoors first and then moving the containers outdoors once the threat of frost is passed.
Plant two or three seeds an inch deep in the center of a roughly ten-inch container. Once the seedlings are three to four inches tall, you can thin to one or two plants.
A cage or trellis can be used for the vines to grow on, especially if space is an issue. You may need to support the fruit with hammocks made from old hosiery.
Winter Squash Pests
There are a few types of bugs that can ruin your squash plants and destroy your harvest. Squash bugs, squash borers, and cucumber beetles can seriously harm your plants.
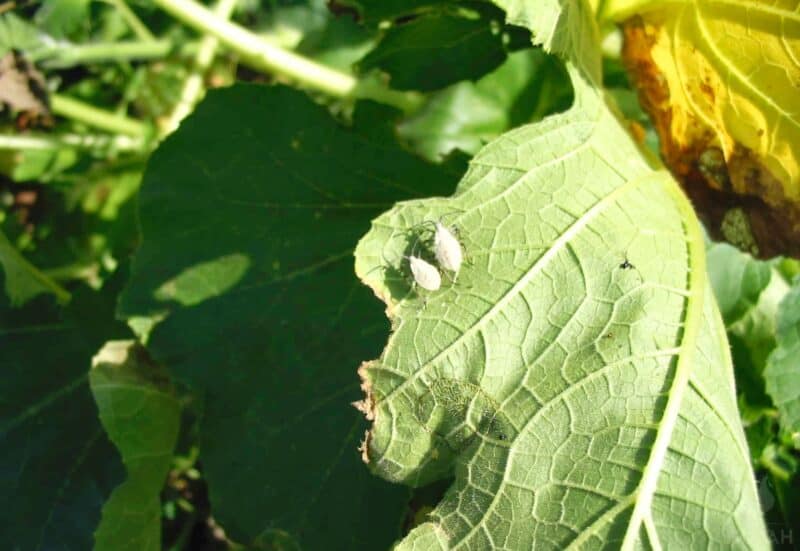
If you see just a few of them, you can handpick them off the plants and feed them to your chickens! Or just hose them away.
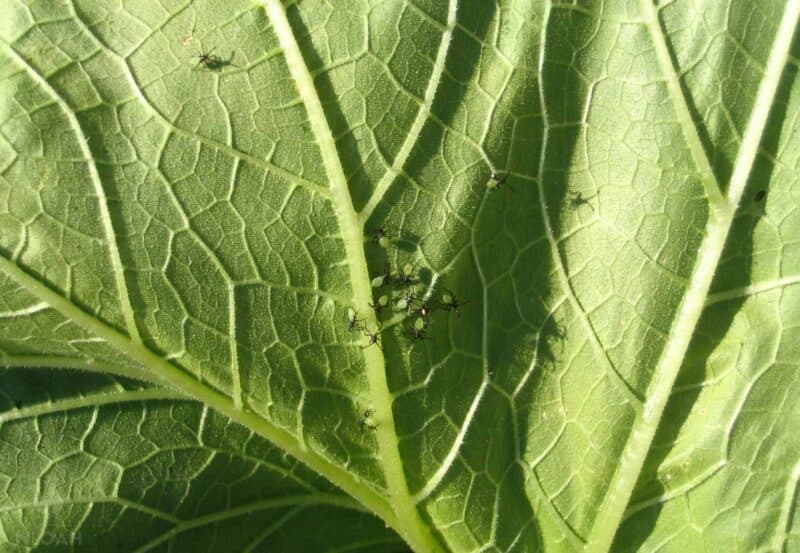
Most often you’ll find them on the undersides of the leaves. Here’s a cluster of Squash Bug nymphs. They totally creep me out:
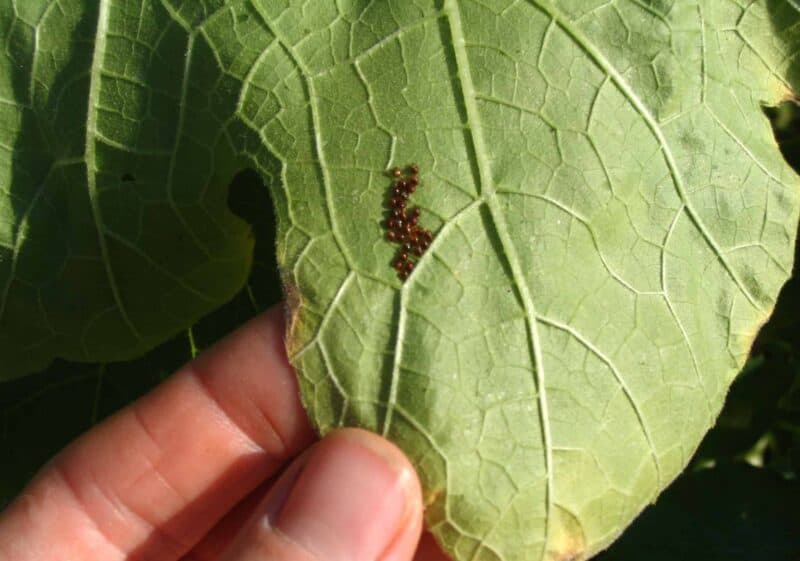
And this is what Squash Bug eggs look like. They’re small, oval, and copper colored. You’ll find them on the undersides of squash and pumpkin leaves. I usually just scrape them off with my fingernail or a stick when I find them:
The best method I’ve found for effectively removing nymphs and eggs quickly is by using the sticky side of a piece of packaging or duct tape. I make a loop of tape to slip my fingers into, so I can just slap the sticky surface onto the cluster of critters as I uncover them:
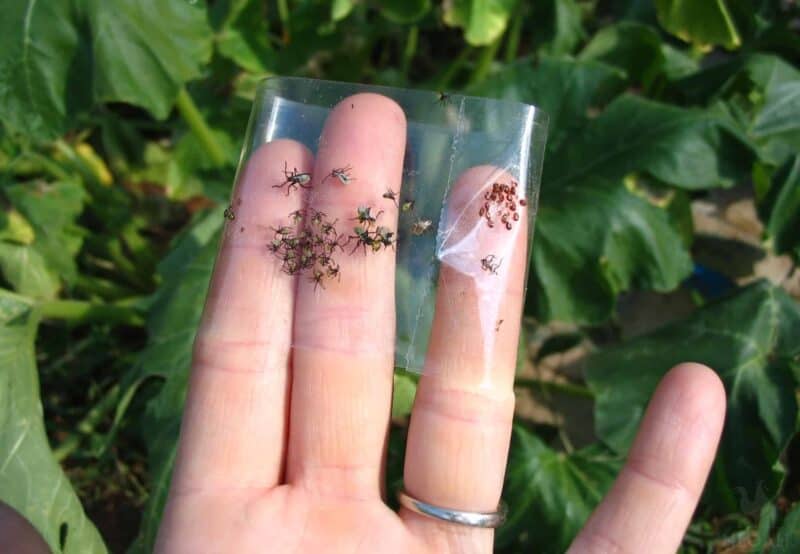
They scatter quickly, so if you can catch them all in one stroke you’ll have better luck.
I also need to sprinkle Diatomaceous Earth around the base of each plant, as this is where adult Squash Bugs like to hide- especially if you’ve mulched the plants (which I’ve read isn’t best to do around the base of squash and pumpkin plants for this very reason).
Amish farmers use row covers to keep Squash Bugs from laying eggs on the plants in early Summer. I may need to try that next year.
If you see unexplained wilting, you might have squash borers. You’ll see a small hole in the stem of a wilting plant. You can cut a slit in the stem and remove and destroy the borers. Then you can cover the slit with soil to grow more roots.
Diseases
There are just a few diseases that affect squash plants. They are bacterial wilt, powdery mildew, and mosaic disease. First, prevent these diseases by keeping your garden free of debris.
Try to always water your plants at the base to keep the leaves free of excess moisture. If plants become infected, remove and destroy them, so the disease does not spread to others.
Powdery mildew, a fungus disease, will cause leaves to turn a gray-white color late in the season. Proper spacing and increased air circulation will help reduce this problem.
Blossom end rot if your squash fruit rots from the blossom end, this is called blossom end rot. It is typically caused by uneven watering or fluctuations of soil moisture. Water evenly on a regular basis and use mulch around the plants to help control moisture.
Winter squash has tough outer skin and hard seeds; it takes a longer time to grow but will last longer in storage. Summer squash grows quickly, has a thin edible rind, and softer seeds but will not store long once it is harvested.
Yes! Winter squash seeds are edible, just like pumpkin seeds. You’ll probably want to roast them, and you may want to discard the tough hull, although that is edible, as well.
Yes, pumpkins are considered a variety of winter squash. And while they are technically edible, some varieties are better suited for carving and ornamental use than they are for eating.


Amanda is a mother of 6 living on a small farm, raising goats and chickens. She’s involved in a lot of things, from foster care to photography.