A couple of years ago our electric coffee maker stopped working. Knowing that we wanted to transition to more off-grid living, we decided to replace it with a non-electric percolator.
I had never in my life even seen a percolator before then, much less did I know how to use one. But as with most things that have come with this lifestyle I was game for trying something different.
Before I can tell you the best ways to use a percolator, I should start by explaining what a percolator actually is. The first percolating coffee pot was created in the early 19th century by Sir Benjamin Thompson.
With a strong dislike of tea and alcoholic beverages, Thompson turned to coffee to satisfy his thirst and developed the earliest version of the percolator. The first patent for a percolating coffee pot issued in 1889 to an Illinois farmer named Hanson Goodrich.
The modern percolator consists of a bottom chamber that is placed on a heat source, like a stove or over a campfire. There are also electric percolators available that do not require a stovetop.
The percolator works in a simple way…
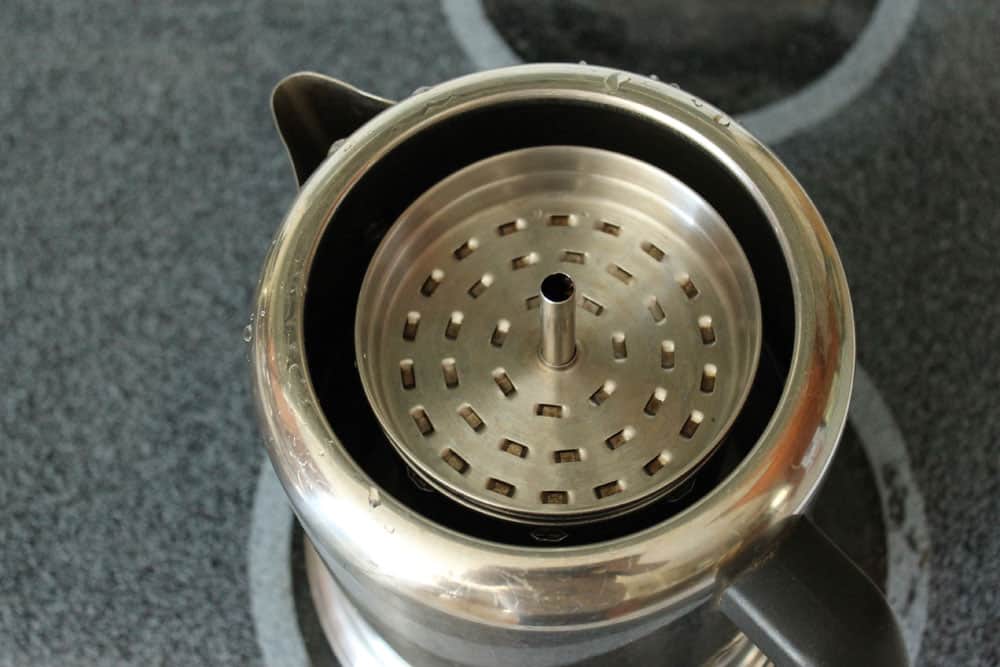
A vertical tube extends from the lower chamber to the top of the percolator, while a chamber rests atop it to collect the coffee grounds.
As water in the bottom chamber heats up and rises to a boil, it comes up and out through the vertical tube. The water flows through the small holes in the top chamber and then starts to steep the coffee grounds.
The water moves back out of the chamber through those perforations and forces more repeated cycles of water through the tube. This process completes until the liquid reaches the boiling point.
You’ll know your coffee is ready when it stops making its characteristic noises. You must remove the percolator from the heat at this time to prevent it from becoming bitter. If you use an electric percolator, it will turn the heat down on its own so that your coffee stays warm and does not return to a second boil.
There are many kinds of percolators, including stovetop, microwave, and electric versions. All work through the use of either pressure or gravity. A pressure percolator consists of three sections that are screwed together, with a lower section containing water and a middle section holding grounds. The top section is home to the brewed coffee when it is finished.
When water in the lower section reaches a boil, it produces steam, which forces water through the tube where it steeps the coffee grounds. Steeped coffee is then held in the top section of the percolator.
A gravity percolator, on the other hand, uses the force of gravity to cycle water through the grounds. This is done consistently until the brew reaches your desired strength. It has a bottom chamber to hold the water as well as a vertical tube and a perforated basket.
The process of brewing coffee in a gravity percolator works in a similar fashion – as water heats up, it moves through the tube and then pours back down over the grounds in the basket and then back into the lower chamber. It repeats until the coffee has hit boiling point.
There are several traits to look for when you are purchasing your first percolator. First, choose between a manual or an electric option. If you are a homesteader who is hoping to one day live off the grid, a manual percolator might be your best bet.
However, if you prefer the convenience of not having to keep an eye on the percolator to remove it once it hits boiling point, an electric model might be more ideal.
Keep in mind that even if you select an electric model, it might not always be more convenient or yield better-tasting coffee. This is because most electric models come with a “keep warm” function that can actually make your coffee taste too bitter if you let it sit for too long.
Look for a model that is easy to disassemble and clean (which we will tell you how to do later) and also consider how fine the sieve is in the filter basket. Sieves that have too-large holes will result in grainy coffee.
If you accidentally purchase (or wind up with through inheritance) a percolator with wide holes, you can always purchase a coarser grind of coffee or use a paper filter.
Percolators can be made out of several different types of materials
The best tasting coffee tends to come from percolators that are made out of stainless steel, while aluminum models can alter the flavor of the coffee, particularly as the percolator ages.
You should also consider the capacity of your percolator. If there are several people in your home (or if you happen to drink a lot of coffee on your own), you will need a larger percolator.
These handy little machines come in at anywhere between two cups to twelve cups in capacity, so you will need to consider how much coffee you make on a daily basis.
Most percolators will come to temperature in three to four minutes, but this can vary depending on the make and model of your percolator. Make sure you read the details and instructions carefully so that you know what you are getting yourself into.
There are other features you can look into to make percolating coffee even easier. Some percolators even come with indicator lights so you can see when the coffee has finished percolating.
Others have detachable power cords (those that are electric, of course) to help make it easier to stash and stow your percolator, while others yet have cool-touch handles and lids to minimize the risk of burns. Some percolators are dishwasher safe, while others are not fully submersible.
For less than twenty bucks I ordered a well-reviewed Farberware Stainless Steel Percolator. We love it. In the beginning, there was much trial and error as we got used to the new contraption, and several batches of burnt coffee to dump out before we figured out exactly how to use it.
Mainly, it was a matter of determining how hot to keep the pot and how long to allow it to percolate. Now that we’ve got it down pat, we wouldn’t go back to an old drip machine.
Percolators can be used on electric stove tops, on a hot wood stove, on a rocket stove, or over an open camp fire. Pretty much any heat source hot enough to bring water to a boil can percolate a cup of coffee.
Percolators are a great choice if you are looking for more flavorful coffee. Although many people like to debate whether drip or percolator coffee are better, very few would argue that percolator offers a richer brew.
They’re also nice because they are so portable, allowing you to carry a pot of coffee to wherever you are seated without having to worry about it losing heat. Percolators are also compact, taking up far less space than a traditional coffee pot that needs to be plugged in on your already limited counter space.
Most days I still make our coffee on the electric stove, though it’s nice to know I can brew a batch without power if I wanted to or needed to.
For those of you who have no idea how to use a percolator to brew coffee, I thought I’d show you step by step how it works.
How To Use A Percolator To Brew Coffee
(with or without electricity!)
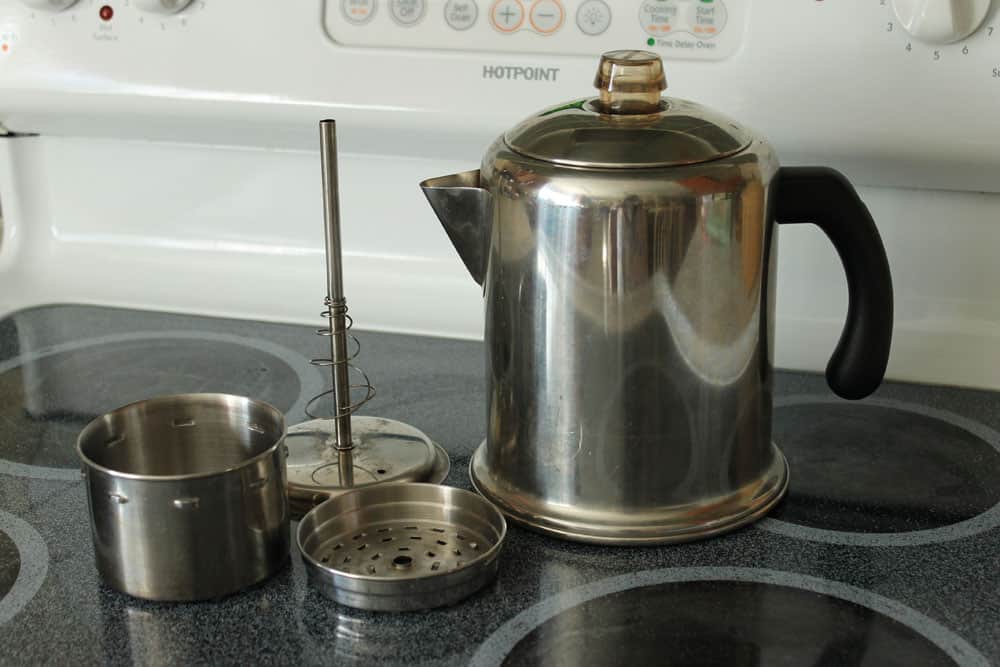
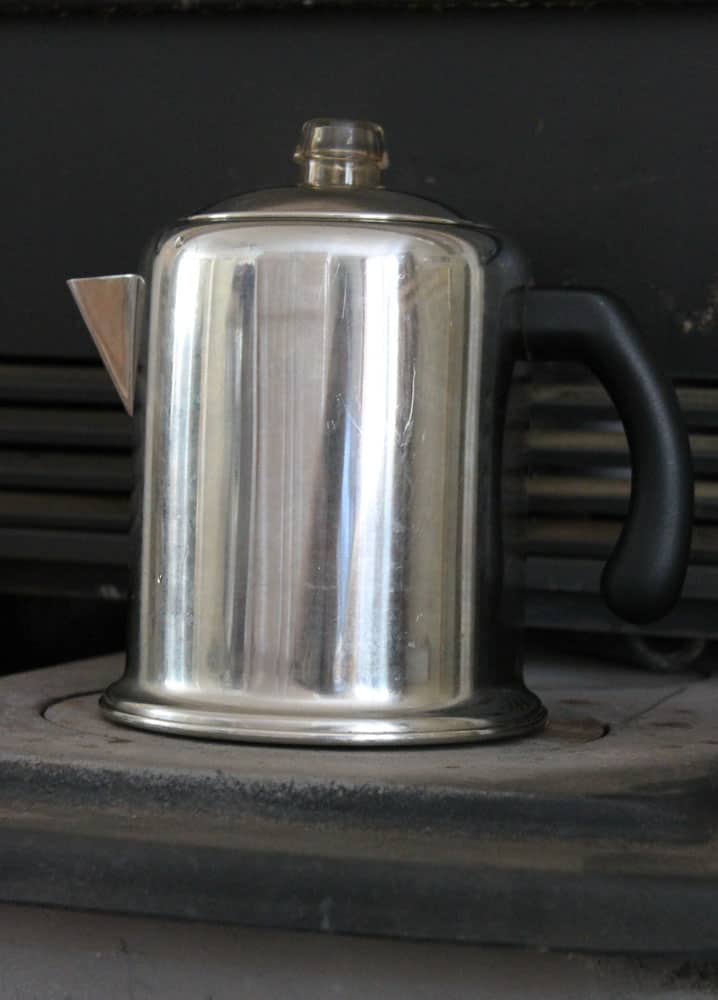
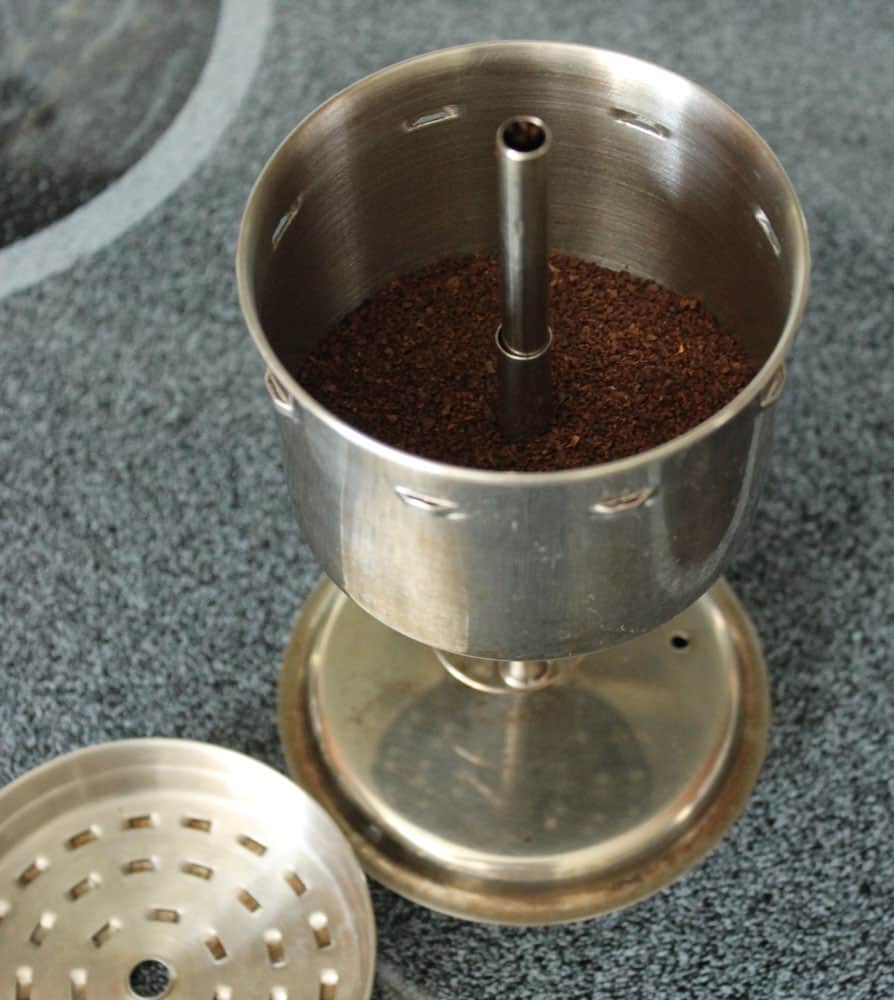
This is our percolator pot and all of its pieces. All percolators look pretty much the same, although some are electric and plug directly into an outlet. The percolator basket is assembled, filled with coffee, and then inserted into the pot to brew. I appreciate how easy it is to take apart to wash, and that there aren’t any pieces to burn out, malfunction, or otherwise need replacing over time.
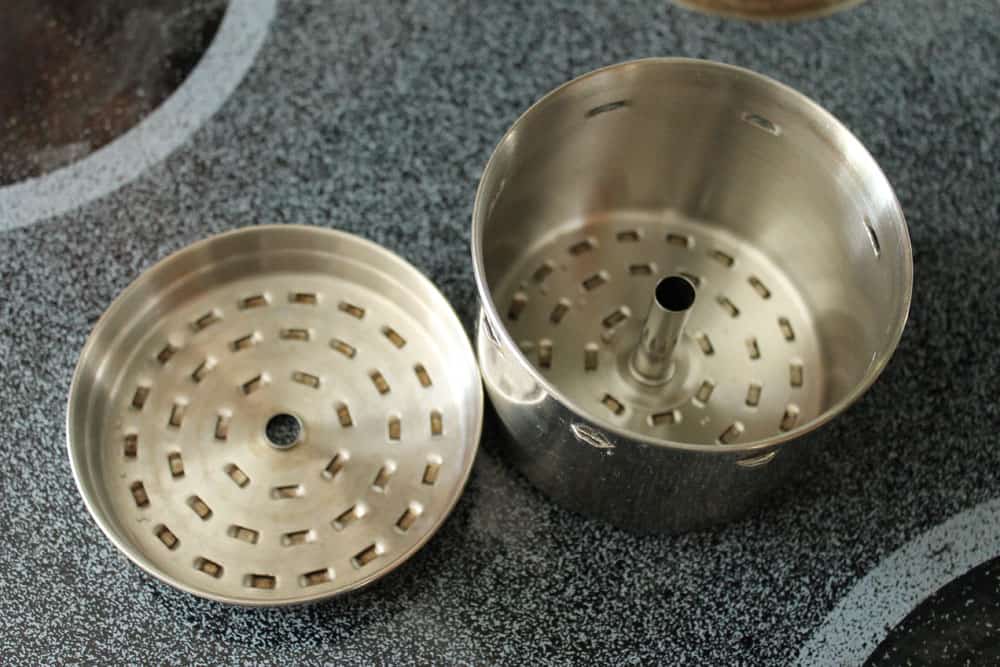
This is the percolator basket and lid.
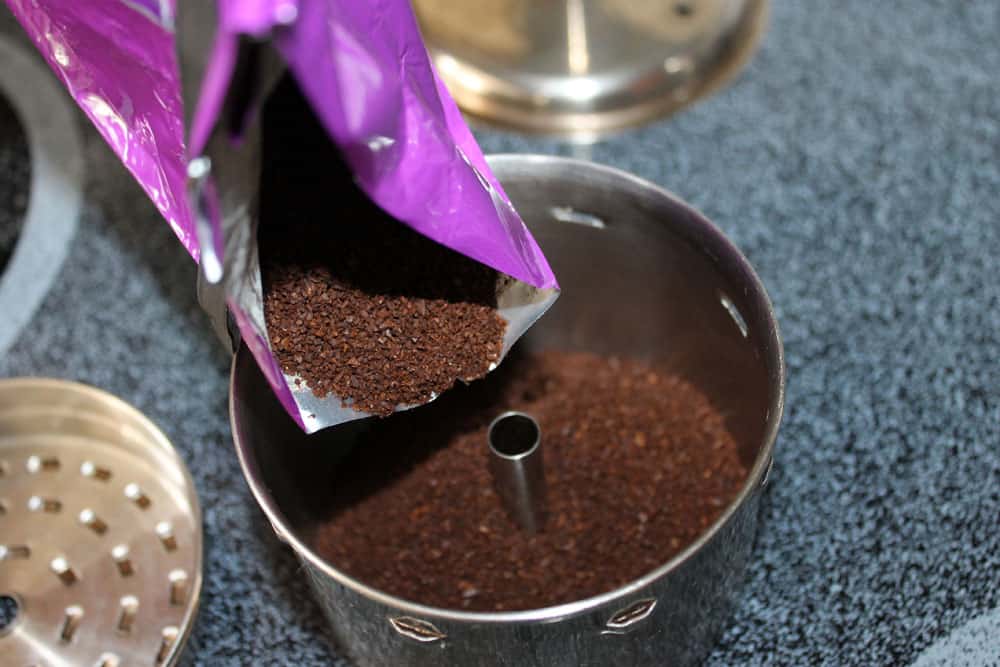
To brew a pot of coffee, first you need to add coffee grounds to the percolator basket. Add about 1-2 Tbsp coffee grounds per cup you want to brew, adjusting to suit your taste. I don’t even measure the grounds out now, I just know approx. where I need to fill the basket for a full pot of coffee.
Put the spring on the stem, then place the filled basket on the stem as well. As shown.
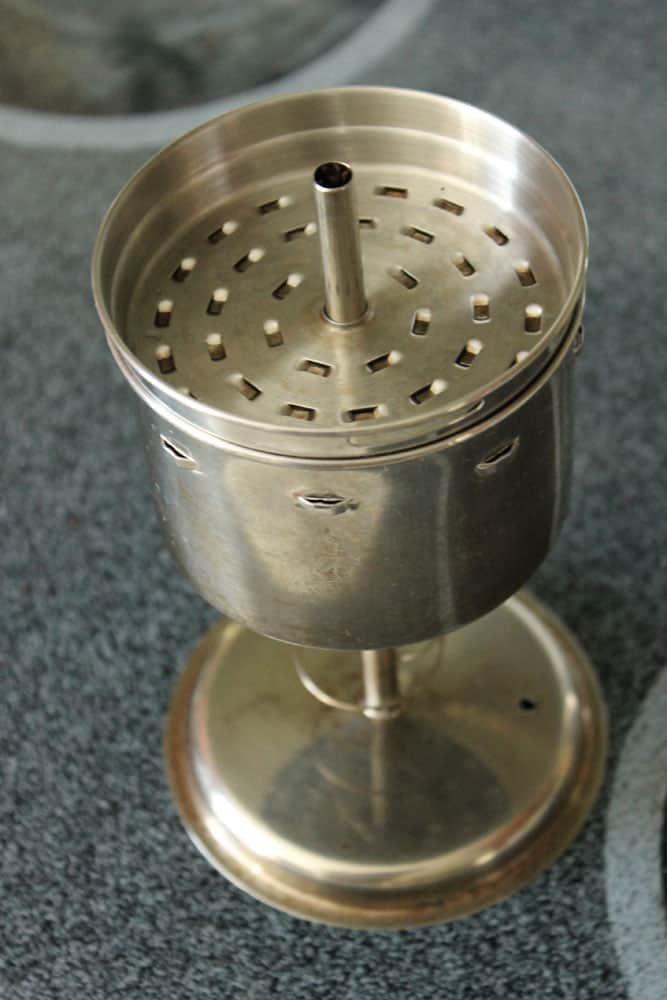
Place the lid on the percolator basket.
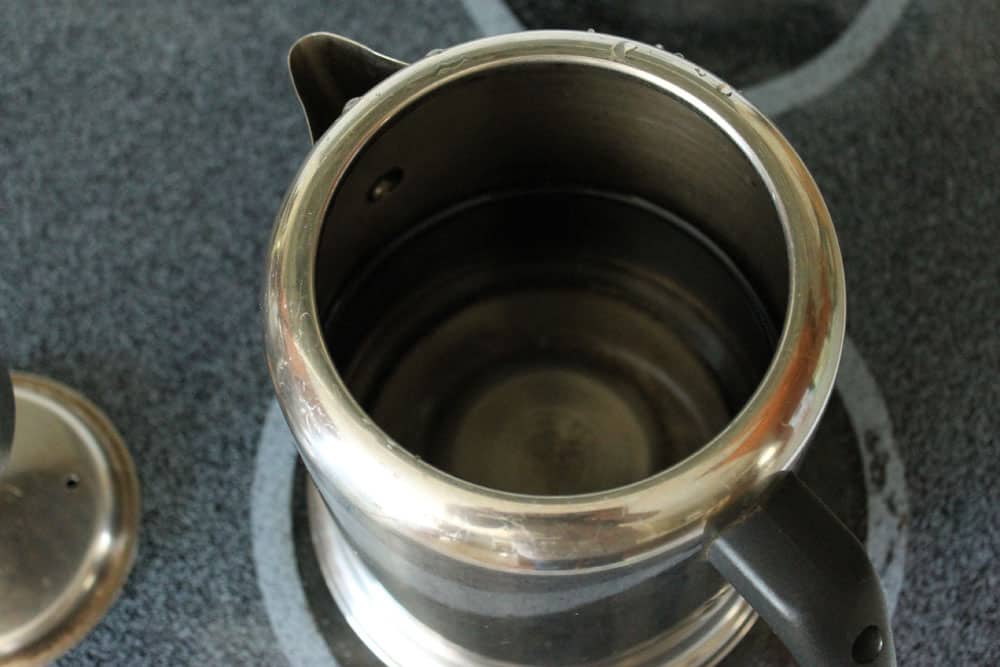
Fill the pot with enough water to brew the desired amount of cups.
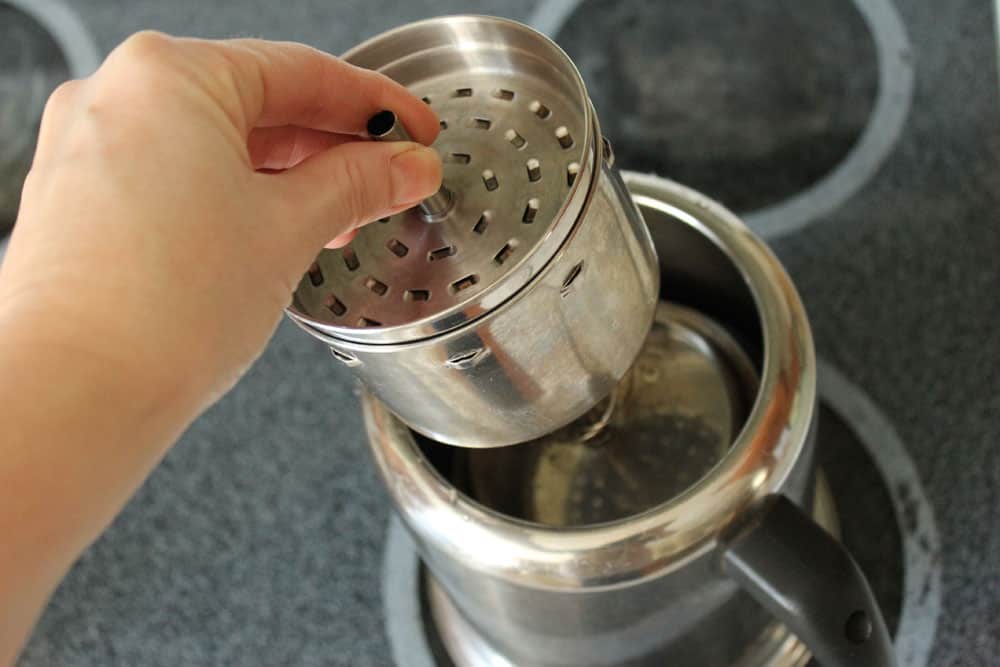
Place the assembled unit inside the pot.
Make sure it’s centered in the pot so the lid can fit over it.
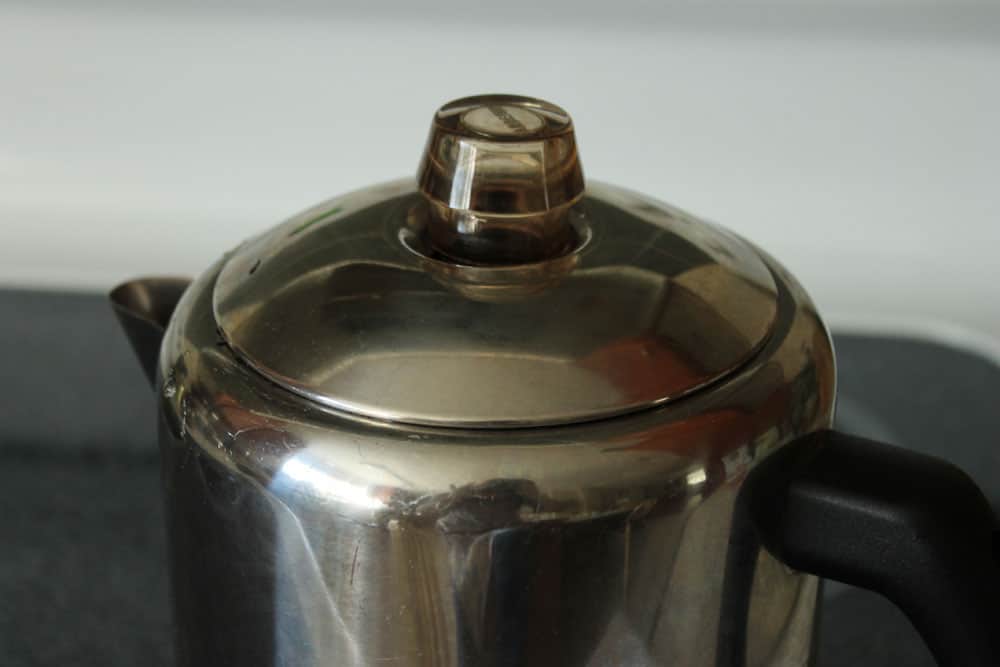
Place the lid on the pot.
Then turn the heat up to high to bring the water to a boil.
If you’re cooking over a wood stove or a fire you may need to add more wood to get it nice and hot in order to bring the water to a hard rolling boil.
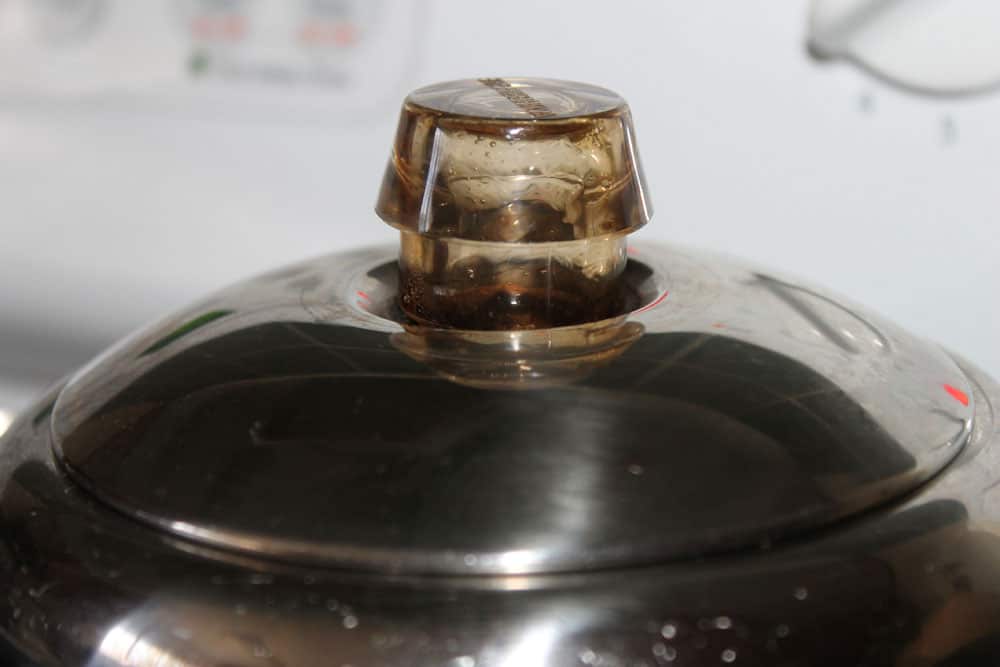
You’ll be able to see the water boiling up through the clear cap on the lid. Once you see that it has begun to percolate…
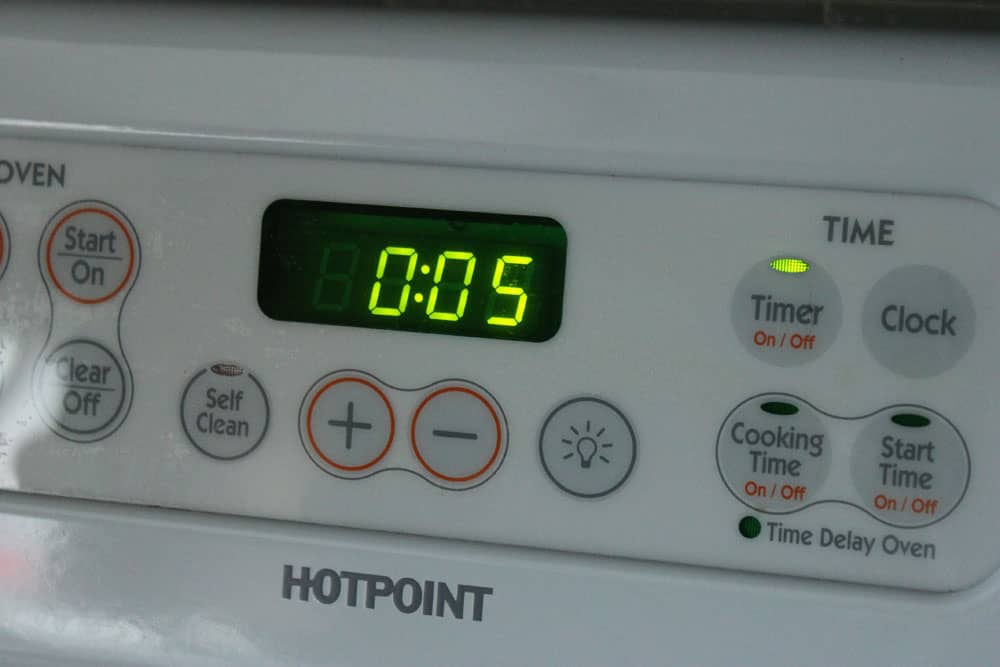
Turn the heat down to medium and set the timer for 5 minutes. (The heat and time may need to be adjusted depending on your heat source.)
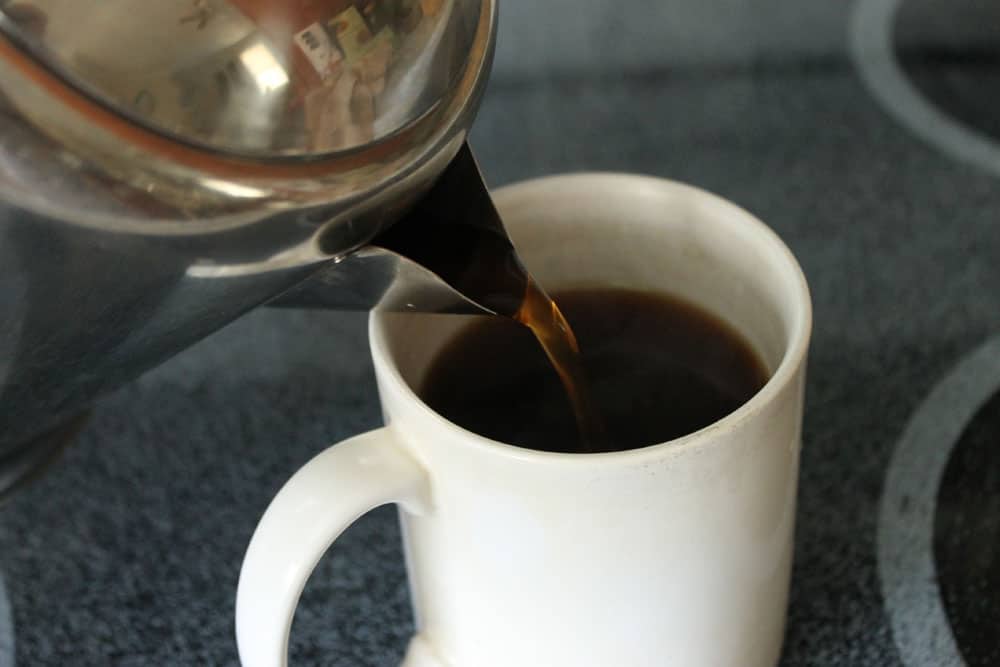
Next, pour your freshly brewed coffee into your favorite mug and enjoy! We love to sweeten our coffee with honey and milk.
If you’re trying to decide between a drip coffee maker or a percolator, you really need to consider your personal preference. Some people believe that percolators result in coffee that is too bitter or sludgy, as the water is repeatedly cycled through the grounds. However, there are also proponents of the percolator who argue that percolated coffee has a distinct aroma and a superior taste.
Supporters (like myself) also argue that percolators cost you less money to make your morning brew in the long run than do drip coffee makers. They are portable, so you can take them with you no matter where you go.
If you’re concerned that the flavor of percolated coffee might be a bit too strong, simply choose coffee grounds that are low in acid and have a mild flavor. This will help your morning cup of Joe be as smooth and delicious as possible.
Here’s what’s cool about a percolator versus a regular drip coffee maker. There are other things you can do with it besides making coffee! Some people argue that you can use a percolator to cook hot dogs, poach eggs, or even make chocolate fondue.
I’ve used my percolator to make rice (eliminating the need for a rice cooker or a stove top), and I’ve even used it to steam vegetables, like broccoli.
A good percolator serves as a handy tool when you’re camping, or even when you’re just simply trying to get by with as few kitchen appliances as possible – or with limited access to electricity,.
Percolators are also relatively easy to clean. Keep in mind that the more often you clean your percolator, the better your coffee will taste. Keeping your system clean can help prevent problems like clogs, and there multiple ways to clean your machine depending on how much time you have free, as well as what cleaning supplies you have around the first.
The first method of cleaning a percolator is with a baking soda and cream of tartar solution. Start by filling your percolator with water, then add two to three tablespoons of baking soda or equal amounts of cream of tartar.
Let the machine percolate, and then let the water cool. Scrub the pot with a nonabrasive tool, like a dishcloth. The baking soda or cream of tartar will do most of the work for you and remove many of the stains.
You can also use vinegar to clean your percolator. Start by combining equal parts of white vinegar and water in a separate bowl. Fill the percolator with the solution, and allow it to finish percolating. Let it cool, and then pour the solution down the sink.
Fill the percolator with another batch of vinegar and water, then repeat the steps mentioned above. For the third cycle, fill your percolator with water only. This will help remove the vinegar smell. If it doesn’t, a quick rinse under the faucet should do the trick. If stains or stubborn build-up persists, you can combine the vinegar method with the baking soda/cream of tartar method for extra efficacy.
You should also make sure to regularly clean your percolator basket. To do this, start by unplugging your percolator (if it’s electric). Fill a small bowl with hot water, and add a couple of tablespoons of mild dish detergent. Stir gently, then take the basket of the percolator, along with the steam and the spreader.
You can use the soapy water to gently wipe down the basket, and this will also give you the opportunity to wipe down other components inside your percolator. Make sure you rinse your percolator carefully so that soapy residue does not remain.
To keep your percolator clean from day to day, make sure you wash it out immediately after each use – don’t let coffee dry inside, as it will produce a sludgy paste. You can use regular dish detergent for everyday cleaning.
Make sure you pour out any unused coffee right away – again, don’t let it sit, particularly if the pot is hot, as this can bake in those unwanted stains. Stainless steel percolators should stay stain-free as long as you can avoid scratching the surface. You should also avoid any abrasive cleansers, scrubbers, or scrubbing devices.
And that’s it! Not so bad, huh?
In case you need something to dance to while you brew your first cup… hahaha!

A city girl learning to homestead on an acre of land in the country. Wife and homeschooling mother of four. Enjoying life, and everything that has to do with self sufficient living.
Thanks for the info, has been a long time since we have perked a pot of coffee
Happy to help! 🙂
It is weird to remember that this is all we had when I was little. I do remember getting grounds in the coffee though.
Kendra,
Thank you for this post! I have never used a percolater to brew coffee, but always wanted to know how. I never realized that they sold ones that work right on your stove top. Definitely going to look into getting one!
Happy to help! 🙂
My husband & I returned to a stove-top percolator about 4 years ago. We had forgotten how good tasting and “hot” coffee really was. Something I learned years ago was to never scour out the inside of your pot, rise- yes, scrub-never. I tried to find out “why” and remember seeing it in a old cowboy movie (John Wayne I think). Couldn’t find anything else on it but if it’s okay with John Wayne then it’s okay with me. I guess it’s like seasoning a cast iron skillet. I also love being freed from filters. I just wait a minute after I turn the flame off and the few grounds settle to the bottom. When camping we made “Cowboy Coffee” and just added the grounds to the hot water and stirred till dark. When done we would sprinkle a dash of salt on the top and that caused the grounds to settle to the bottom. Cheers!
We love perked coffee. Before we moved off grid we practiced and it became a routine habit.
One thing we do to save propane is to have the pot with the water in it sitting on the woodstove, then it is very close to perking when we put it on the propane stove.
We love strong coffee and perk for 8 minutes. 🙂
A drip, the original three piece drip coffee pot that you just pour boiling water through, is even better. It is WHY the new electric “drip” pots came to be. NEVER bitter – which a too-long perked pot can be.
Both perked and drip coffee needs to be reheated later in the day for that second cup. We keep a little tin pot for that – on any kind of fire.
I have used a non-electric dripolator for 50 years. I boil the water in my teakettle, then pour it into the top of the dripolator. Three minutes later I have perfect coffee! I use half a cup of coffee grounds to make 3 1/2 mugs of coffee (I like it fairly strong since I use sugar and cream). I make the best coffee around! Of course, that’s because I have fantastic mountain spring water here on our farm. I can use my dripolator and teakettle on my electric stove, or in emergencies on the propane heater or the woodstove. Just so much better.
Perked coffee is so good made at home on the range or over a campfire. What’s nice is, there are filters available for a percolator. This helps cut down on any grounds. There’s just nothing any better than a good cup of coffee to meet the day.