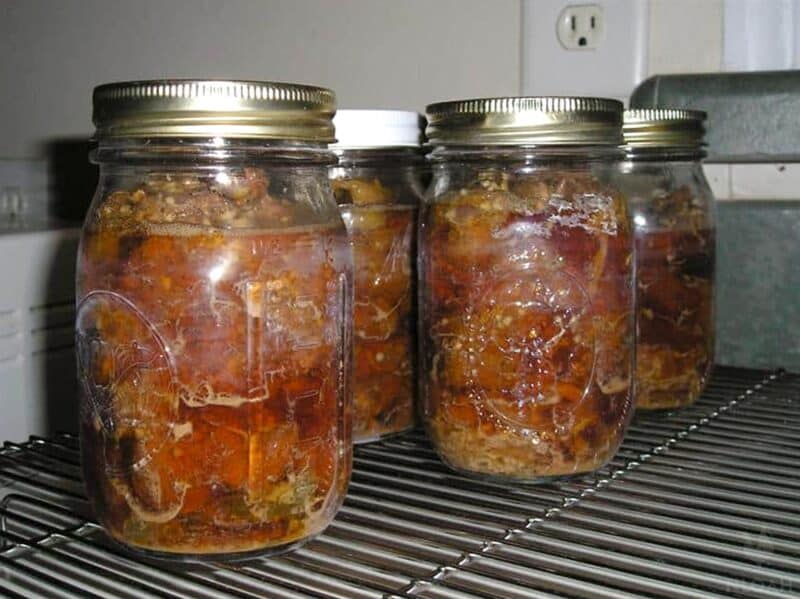
I canned five pints of venison over the weekend, using my pressure canner for the first time ever. I have to say, having such a large contraption hissing and steaming at you is quite intimidating!
At times, it was downright scary. And my husband wasn’t helping. He kept telling me, “Uh, Kendra, maybe you should get back from that thing. No, seriously, Get Back!” He’s so funny.
A friend of ours who hunts had a freezer full of venison. Well, his freezer went out and all of the meat had thawed, so he had to do something with it. He gave us several Ziploc bags full of meat, but I knew I couldn’t re-freeze it, and it was way too much to eat within a few days, so I was determined to can it.
This recipe works wonders not only for deer venison, but also for other wild game like moose, bear, and elk. It’s from the National Center for Home Food Preservation, and is the same recipe you would use to process beef, lamb, pork, and veal. So you know it’s safe!
Do You Have to Cook Venison Before Canning?
Yes and no. It depends on the recipe you use.
The NCHFP has both raw pack and hot pack methods for canning venison listed on its site. Which option you prefer is up to you – but personally, I prefer raw pack since it’s faster in terms of prep beforehand.
I also think it lends more flavor to the finished deer meat, since you’re not cooking it quite as much and allowing it to “marinate”, as it were, in its own juice.
Here’s how to do it…
Canned Venison Recipe
Ingredients per Pint Jar
- 1 pound lean venison (cut into cubes or chunks)
- 1 teaspoon salt
- ½ teaspoon ground black pepper
- 1 teaspoon minced garlic (optional)
- 1 teaspoon onion powder (optional)
Directions
1. Get High Quality Meat
Before you begin to process and cook your venison, make sure you have the highest quality of meat. Try not to use meat that is freezer burned or damaged. Remember, the final quality of your canned goods is only as good as the ingredients you use to create them.
2. Remove Bruises, Fat, and Gristle
Carefully inspect each piece of venison and cut off any areas that have been bruised, as well as any gristle or extra fat. Most deer don’t have a ton of gristle or fat, but when you put these items in canning jars, they have a tendency to get a little unsavory tasting.
Plus, the texture is strange. It’s not worth it – just cut it all off and either throw it out, or feed it to your chickens (they love the extra fat in the winter). If you’re feeling extra motivated, you can save the fat and boil it down to make suet for your birds later on. But that’s another topic! Back to the venison.
3. Slice Into Strips
Slice the venison into strips that are about an inch thick. If you’d rather, you can cut the meat into cubes, instead. It’s really up to you, but think about how you plan to use your canned venison later on, as this will make the decision easier. Just make sure the meat fits easily into your jars without you having to force the pieces down too much.
4. Sanitize the Jars
While you’re processing your meat, you can work on sanitizing your jars. The easiest way to do this is to run them through the one-hour cycle on your dishwasher. This is a good habit to get into, regardless of whether you are reusing jars between canning seasons or using fresh store-bought ones.
Either way, there’s going to be some yucky residue on all of your jars that you really need to get rid of. You don’t need any extra bacteria hanging around that’s going to poison your food.
5. Brine the Venison
This step is optional, but I recommend it if you’re working with any strong-flavored meats. Soak the meat for an hour in brine water that contains about a tablespoon of salt for every quart of water (it doesn’t matter how much water you use). This will remove a lot of the gamey flavor.
6. Season the Meat and Load Your Jars
Place the uncooked venison into a large bowl. Sprinkle with salt, pepper, and garlic; toss to combine. Stuff the venison into each canning jar.. Jars should be filled to within 1/2 inch of the top.
What’s interesting about canning venison with the raw pack method is that you don’t need to add liquid. This is not the case for practically anything else you can, so that caught me off guard for a minute. The meat actually produces its own liquid, so no extra water is needed.
7. Remove Air Bubbles
Once your jars are filled, use a large wooden spoon to get out the air bubbles. Don’t stress too much about this part – it’s almost guaranteed that you won’t be able to remove ALL of the bubbles. Just try to get most of them, especially the ones that create large gaps.
8. Wipe Rims and Screw on Lids and Rings
Once your jars are filled and the air bubbles are removed, wipe the rim of each jar with a clean, damp cloth, then screw on the lid and ring.
Remember, you can reuse canning rings between canning cycles, but never reuse the lids, as they will fail to create a tight seal, and you don’t want your storage space smelling like spoiled meat, do you?
9. Load the Canner
Place filled jars into your pressure canner and proceed as per manufacturer’s directions. When you’re filling your canner, make sure the jars aren’t touching each other.
This isn’t always possible, but if you’re having trouble getting them not to touch, consider tucking an old, clean towel in there so that they don’t crack when they bump against each other.
10. Process the Jars
Process pints for 75 min at 11 lbs pressure (or quarts for 90 min. at 11 lbs pressure). If you live at a higher elevation, make sure you adjust the processing times for your altitude.
These instructions are for a dial gauge pressure canner. If using a weighted gauge, process for the same amount of time but at 10 lbs pressure instead.
11. Let the Canner Sit
Be sure you wait to take the lid off the canner until the pressure has dropped back down and equalized.
This is where pressure canners get a really bad rap – a lot of people have been seriously burned by the pressure release that occurs when you take a lid off before the canner has equalized. Instead, wait until the pressure has dropped.
Sometimes, I do my canning in the evening so that I can just let the jars sit overnight until the water has totally cooled and the pressure has gone back down.
You don’t need to go to such extremes as I did, but just, whatever you do, make sure you let the pressure return to normal.
12. Remove the Jars
When it’s safe to do so, remove the jars with a set of tongs and turn them upside down on some clean towels. Don’t put the hot jars directly on your counter, as this can cause some seriously unsightly rings that are just about impossible to get rid of! Try to select a spot in your kitchen that is out of the way of a direct breeze, as this can cause your jars to crack as they cool.
13. Let the Jars Rest
Let the jars rest for twelve to twenty-four hours. You might hear little popping noises as they form seals on the lids – that’s totally normal. After the proper amount of time has elapsed, check each jar.
There shouldn’t really be any flex in the lid. If there is, or if something seems loose, your jars might not have sealed and you either need to put the jar in the refrigerator to be eaten as soon as possible, or go back through the canning process again.
(I advise just eating it – you don’t really want to re-cook that meat again, as it will get awfully chewy).
14. Using and Storing Your Canned Venison
Now, after you are done canning and the jars have cooled, you may notice little chunks of food or even a white-ish residue on your jars. Don’t worry about it!
As long as the jars have sealed correctly, a little bit of debris is nothing to worry about, and white residue just indicates that you have hard water. Just wipe your jars down with a damp rag before storing them.
Now, when you go to store your venison, make sure you are keeping the jars in a cool, dark location.
Can You Add Other Ingredients To Your Canned Venison?
You might be wondering if you can add other ingredients besides the teaspoon of salt, pepper, and garlic/onion powder to this recipe.
The short answer is…kind of.
You can often add other ingredients like tomatoes, tomato juice, beans, pasta, or even tomato sauce to the recipe, but I always recommend looking for an approved recipe before you do so.
The reason is that these ingredients can alter the canning time. Both the National Center for Home Food Preservation and Ball Blue Book have approved recipes for all sorts of things, so consult them first before you decide to add anything else.
Can You Use a Water Bath Canner to Process Venison?
Water bath canners cannot do this job. This is because water bath canners are designed primarily for high-acid items like fruits and pickles; venison requires a pressure canner to ensure that there are no bacteria left in the jar when it is finished.
Pressure canning achieves much higher temperatures than your average water bath canner gets up to.
Can Ground Venison Be Canned?
You can even can ground venison! By looking into the National Center for Home Food Preservation, you can find many recipes for safely canning ground beef which can easily be adapted to ground venison.
This not only allows for delicious meals throughout the year, but also preserves a piece of the outdoors in your home kitchen.
How to Tell if Canned Venison Has Gone Bad
Your canned venison will last for years in the proper conditions, but I recommend labeling each jar with the contents and the date you canned, just so that you don’t forget what was in them later on and think your peaches have gone really bad!
You can even take the bands off once the jars have sealed. The lids will form a tight enough seal, and if you keep canned goods long enough in storage, the bands might start to rust.
Taking them off is an easy solution. Never eat spoiled canned goods, especially spoiled canned meat. It’s usually pretty easy to tell when something has gone bad.
Canned meat gone bad will often blow the lid off the top, or it will become misshapen as the lid begins to bulge. Greasy jars aren’t necessarily a sign of spoilage, but a rotten smell definitely is.
Sometimes there will even be mold growing on or around the jar. If a jar looks like it has gone bad – even slightly – don’t eat it. You risk contracting botulism and a number of other nasty foodborne illnesses. Just toss it and try again next time!
Overall, I really enjoyed canning venison. The process was not tough – it was actually really easy, ’cause you don’t have to cook the meat or anything beforehand; just chop it up and pack the jars. I wondered if the meat would be cooked after being canned. YES! It is definitely cooked. It smelled SO good when it was finished.
How to Use Canned Venison
All I’ll have to do is dump it out of the jars and heat it up before serving. Here are some ideas for using the meat:
- Serve over rice, mashed potatoes, or noodles.
- Eat it on a sandwich.
- Make venison quesadillas, or tacos.
- Use it in a stew or soup.
- Create a homemade stroganoff.
- Make a delicious venison casserole.
- Use it to thicken a gravy.
I’m pretty proud of myself! I’m even tempted to thaw out a bunch of the beef we have packed in our freezer to can as well. I also made deer jerky from what our friend gave us… but that’s another post!
Long story short is this – canning venison is a great way to make the most of your meat and free up some valuable freezer space at the same time!
Oh, and by the way, I used my canner on my flat top stove… even though you aren’t “supposed to”. They warn that the weight of the canner could crack the glass top stove surface, or that it will ruin the burner element due to the pot being larger than the burner.
I just crossed my fingers and hoped for the best. I’ve had a lot of other people tell me that they’ve had no problem canning on their flat top stoves. I’m happy to say that I had no problem doing it as well.
Have you ever canned venison? Do you have a favorite recipe to share?

A city girl learning to homestead on an acre of land in the country. Wife and homeschooling mother of four. Enjoying life, and everything that has to do with self sufficient living.
I have been canning fish for years think i will try this recipie thanks only time i canned deer meat had to many smokies so canned a dozen jars in tomatoe sause they were great lol
I have been canning for thirty years have used alot of recipes but this one for the spices is the best not too over powering cause you want to leave this for the one actually finalizeingthe recipie
I don’t have a pressure cooker can I use a hot water canning method?
The only safe way to can low acid foods (meats, beans, veggies, meals-in-a-jar) is to use a pressure canner. A hot water bath canner won’t get hot enough to kill potentially deadly bacteria in these foods.
Hi Kendra, I have a question about my pressure canner. I purchased an All American canner a year ago, and I have used it to make pasta sauce and canned boneless chicken, both times following the recipe. When my canner has reached the correct pressure, it leaks a small amount of steam/foam from one side of the canner. This did not effect the pressure readings, and correct pressure was maintained. Is that something that is considered ok, and is the food safe to eat? Also while I was canning the chicken, the power went off during the last 15 minutes of the cooking cycle. The canner retained pressure during that time. Do you think that the meat is safe to eat? Thank you, Allison
Hi Allison,
Leakage from the lid can happen if it isn’t on exactly evenly. It won’t hurt your canned goods as long as the pressure is maintained. It’s okay that you lost power in the midst of canning as well, as long as the pressure stayed the same. Your food should be just fine. 🙂
I have had an American pressure cooker for over 30 years and my daughter also has one. If a new canner or one that has set awhile leaks steam around the edges, I lightly “grease” it with petroleum jelly when it is cooled. It has helped seal it. Also be sure to line up the arrows every time.
It doesn’t say in the recipe, but just to be sure, no water is added to the jars?
Right, no water is added. The juices from the venison will come out during the canning process. Enjoy!
How long does it last once its canned?
Rich,
Canned meat will last for years as long as it has been canned properly and stored in a cool(ish) place out of direct sunlight. Over time the taste and texture will change, and the nutritional content will diminish, but it will still be safe to eat. Just make sure the lid still has a strong seal before consuming.
Love your site! Found just the recipe I needed. Thank you. Hope to share some canning info in the future.
I just started canning our deer this past weekend when our one son got 2 deer in one day. We ended up with 12 quarts and 12 pints of canned deer meat. It is very good and we will use it up probably within a month! (We have a family of 6) My recipe is as follows and is done by raw packing the cold venison:
For a pint: Fill the jar 1/2 full with venison and then add 1 spoon of garlic powder, 1 spoon of onion powder, 1 beef bullion cube, 1/2 tsp salt. Then fill the rest of the jar to the neck of the jar leaving a 1″ head space. Place a heated seal on top and finger tighten the lid. Then process for 90 minutes once the regulator starts to gently rock.
For a quart: Fill the jar 1/2 full with venison and then add 2 spoons of garlic powder, 2 spoons of onion powder, 3 beef bullion cubes, 1 tsp salt. Then fill the rest of the jar to the neck of the jar leaving a 1″ head space. Place a heated seal on top and finger tighten the lid. Then process for 120 minutes start the timing once the regulator starts to gently rock.
When you say fill the rest of the way to the head space. Is the ingredient venison?
Sorry I am a newbie at this and don’t want to mess it up.
I learned about this from a friend and it is my absolutely favorite way to cook and eat venison. The meat i s so tasty and tender! Being a working mom, the dinner on the table gets there that much quicker!
I made a big pot of veinson stew and now I have way to much to eat.Can I can what is left over.
Grizzzzley,
You can can leftover soup and stew, but the flavor may change, depending on what types of spices you’ve put in it.
A friend told me about canning deer meat and i got a chance to try and it is wonderful, she was asking me if i had heard of making and canning deer stew, if i had any old recipe book that had it in one but i’m not sure. I was wondering if you had ever heard of this and is it possable? And if so could you post or send me the directions.
Shannon,
Absolutely! You would can venison stew just like you would can beef stew 🙂
All ours is already frozen. Can it be thawed and canned with no problem? We have mule deer…pretty big deer.
Yes, you can thaw it and can it. I have about 40 lbs of venison in my freezer right now that I need to can! 🙂
I have canned venison years ago and just started again. We have always added a small cube of beef tallow to the jars, a piece of onion and a clove of garlic, canning salt to taste. This is a great way to process that gnarly old buck, so tender after the pressure cook. Cheap too! Awesome quick meal, 10 minutes to the table!
well here i go. just got the jars in the cooker. hope i dont blow the place up. did everything your recipe called for. now i have to wait and maybe have a beer to take away the anxiety. haha
Mark,
I’m so proud of you!! Just follow the directions for your canner… don’t freak out when it starts hissing and steaming, you’ll be okay 🙂 Let me know how it turns out!
I’ve never canned it before, but plan to this fall now that I have a pressure canner. I was given some by my grandmother once and I used it to make venison bbq sandwiches. Just add sliced onion and the bbq sauce to meat in a crockpot. Simmer until onion is cooked and sauce is thick. Quick and easy!
I can meat all the time and we like it better than frozen meat. In fact, venison is usually much more tender after being canned. I can venison stew as well as other stews. Canning is so smart as if you have a power outage you don’t have to worry about the meat in your freezer. Enjoy your new canner!
womderful!!!! I am so happy for you 🙂 I feel so blessed and complete when I have learned a new skill….gives me a sense of security for the future 🙂 Love ya
I have never canned venison(or anything else)but my Grandma used to can it.It sure was good.
Thanks, this will come in handy this fall if son (14) gets another deer! We have frozen what came from the first ever one this year, and almost all of it is gone already lol. Told him to shoot a bigger one next year!
It’s funny, but as I’m reading this, I can almost taste the cold-packed deer. It’s YUMMMMMMMMMMMMMMMMMMMMY!!!!